


Hi all,
It's Kelly from http://www.kamscraftyplace.blogspot.com/ . Today I wanted to make a mini album. I have wanted to get the serenade cart for a long time. Finally I have it. I love the bird cages on it. This inspired me to make a bird cage mini album. I like to use one image and change it to make a great mini album.The bird cage is 5.94 inches in height. I left the link on. I used K& co paper.
 I used two layers for my Gypsy file. This is the first layer. On this layer I used one of the bird cages with all the bits cut out. The second image is using hide contour to a solid image. I use two and three images when I cut my chipboard out as it's not 12 x 12. So it doesn't fill a whole mat. I use cereal boxes and pizza boxes for my chipboard.
 Here is the first layer cut out.
 Here is the second layer on the Gypsy. As you can see the three bird cages have had Hide contour used on them. I used hide contour on one image and then copied that image twice. It saves time. Copy is the button with two squares on top of each other.
 Here is layer two cut out.
  When I cut the paper for these shapes I used layer 2 and 4 cages. I copied another cage as I was using all of the cutting mat as I used 12x12 paper.
 I cut layer 2 twice with two different sheets of paper. Here is the first lot cut out.
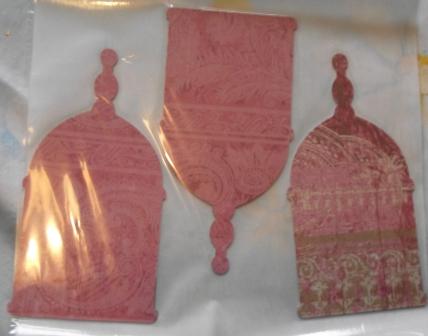
 Here is the second lot cut out.
 Here are all the shapes, paper cut out.
 For the bird cage I used gilding flakes. I put all the gilding flakes in a ice cream tub with a paint brush to store it. My gilding flakes were a mixed bag. You can buy just gold, silver or bronze on it's own.
 I used the Xyron creative station to put a layer of adhesive onto the cage.

I then placed the cage in the flakes as you can see in the picture. I then used the paint brush to brush the excess flakes off. I used a circle motion and didn't press to hard. Using the xyron saves having to buy the size for leaf metal. Basically a glue you paint on and have to wait until it goes clear before you put the flakes on.

I then used the zyron for adding adhesive to the chipboard. I sometimes find it easier than using my ATG gun.

To finish it I used my crop a dile to cut a hole in the top of the cages. This is where I have attached it together with fibre.
I haven't added anymore to it as I always add most of the finishing touches after I choose the pictures. Also I haven't decided which one of my children should be behind the cage yet lol.
I hope you enjoyed this project. Please check out my blog for other great projects.
Kelly:)


11 comments:
Kelly this is a BEAUTIFUL MINI ALBUM love the bird cage and the antique look is AWESOME! What a neat effect it has. Thanks for being with us today.
I agree it has a antique look and is beautiful... thanks for sharing.
What a sweet and beautiful mini!!!
what a sweet mini!
cool....i just finished a card for my Serenade series using the same cut, lol.
nice idea to make an album with it. gorgeous!
Beautiful album!
Super cute. I love birdcages:)
You make this look so easy!!! This is gorgeous!!
very pretty!
Oh my so beautiful!! Love those gold flakes you put on! Thanks for sharing your gorgeous project!
melissa
Absolutely the BEST tutorial I've seen! Thanks so much!!!
Post a Comment