


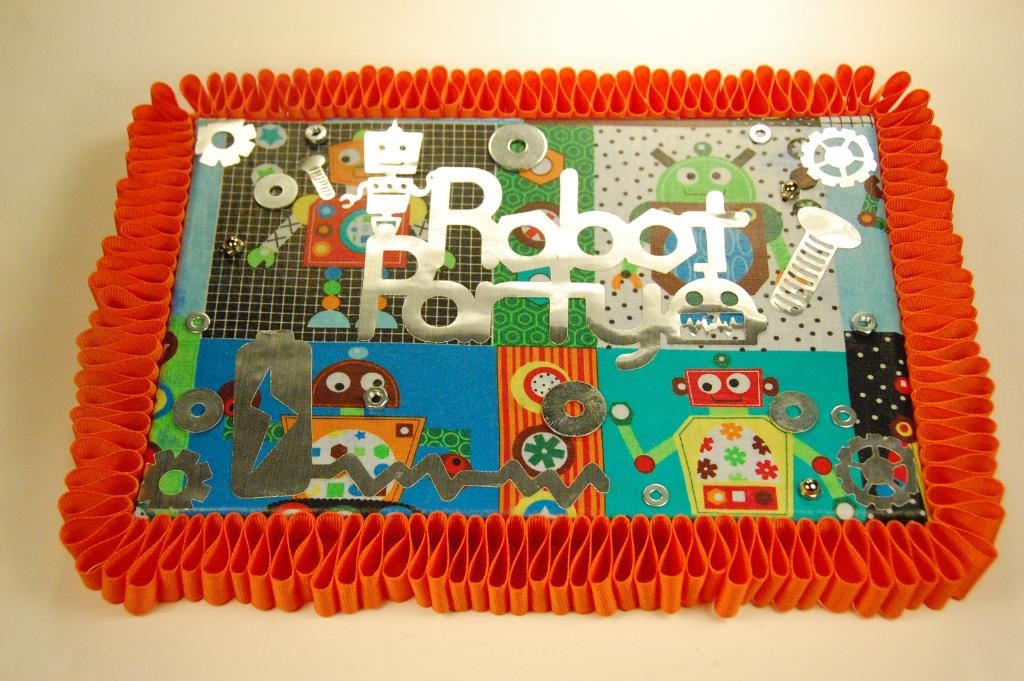
Hi everyone! This is Elizabeth from 217 Creations. I love experimenting with canvas. This home decor piece is one of my favorites. It was really easy to make. The entire project was made with the Cricut cartridge Robot Party.

This project was made for a manufacturer. As a result I did not do a full photo tutorial. But I do have a complete list of instructions to duplicate this project.

Cut List
<NameTgLyr>
3.0 inches (real size on)
<Card1Lyr>
4.0 inches (real size on)
<Card1Lyr>
4.0 inches (real size on) FLIP
<RoboPrty>
5.0 inches (real size off)
<CpckWpLr>
3 inches (real size on)
Supplies
Canvas
Silver Contact
Paper
Transfer Tape
Metal
Embellishments- nuts, caps, washers
Acrylic Paint
Sponge Brush
Modge Podge
Matte
E6000
Robot Patterned
Fabric
Robot Party
Cartridge
Directions
- Using an inexpensive canvas, paint a thin layer of blue acrylic paint along sides and across the front.
- Once dried, measure and cut a piece of fabric to cover canvas and sides.
- Smear a thin layer of Modge Podge Matte on canvas.
- Lay down fabric
- Smear another coat of Modge Podge Matte on top of the fabric.
- Repeat Layering the Modge Podge twice, drying in between coats.
- Cut <NameTgLyr> <CpckWpLr> <Card1Lyr> <CardLyr> Flip and <RoboPrty> from Silver Contact Paper, using settings: 3Depth, 3 Pressure, 3 Speed.
- Weed out the vinyl and using transfer tape, lift the contact paper form backing and place onto the dried canvas.
- Smooth the cuts down firmly
- Using E6000, adhere several small metal embellishments, including, nuts, bolts, washers
- Once the metal has dried, run a 1 inch wide strip of Terrifically Tacky Tape to the sides of the canvas. Removing the liner on one side at a time, begin to pleat the ribbon up about an inch and then down an inch. Continue this all the way around the canvas.
I did not
make the pleating “perfect” since the theme is a bit quirky,
playful and fun
I hope you enjoyed my project! As always Thank you for taking the time to leave a comment and subscribe to us here at She's A Sassy lady and on my personal blog at 217 Creations.


8 comments:
That came out awesome, love the look of it. Love the pleated ribbon.
Super cute Elizabeth...Love the fun edge and how cute are all those robots! The metal is gorgeous too!
hugs
M
How unique! Love the design and the bright colors Elizabeth. This is just as cute as can be! Thanks for sharing with us today.
Elizabeth, what an awesome project!!! Leave it to you to always amaze us all!!!
Great project Elizabeth and super tutorial!! love the metal shinny paper!!
wow. I love the way you have added the ribbon on the canvas.
Awesome Job!Too Cute....
This is such a fun project!!! Love the ribbon!!! Congrats on making this project for a manufacturer!!!
Post a Comment