Hi everyone, this is Kristy from Craftin-on-my-door, and I want to "THANK" Sheila for allowing me to be the guest designer again, on She's a Sassy Lady! I hope you all had a fabulous Valentine's Day! Today I decided to show you a layout I did of my little Stinkerbella. For Christmas we decided to "get out of town" and celebrate with my husband's parents in Pismo Beach, CA. One afternoon we took a short drive to San Luis Obispo, and walked around the shops downtown. We got lucky and found a fantastic craft store called Beverly's! This is where I found these adorable flowers, and KNEW they would go perfect with this layout!
Here's the layout:
Have I told you how much I {heart} my Cricut?! For the titles I used Rock Princess.
The Glam Baby is from page 36. I cut all the layers at 4.76" using my Gypsy.
Then I doodled around each letter on the top layer, added some baker's twine, and popped it up with 3D-dots.
The Sweet is from page 40. I cut all the layers at 2.06" using my Gypsy.
Again, I doodled around each letter on the top layer, added some baker's twine, and popped it up with 3D-dots.
The "SO" was cut using the Country Life font. I unlinked the width and height on my G and cut it at 4.43" by 1.75", in order for it to look like the Rock Princess titles. I also doodled around the s and the o.
I used a corner punch (on 2 of the photos), doodled, added some twine, and then popped them up with 3D-dots. I also used dots to pop up one picture on each page.
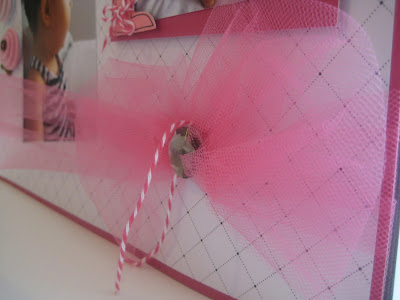
Next, I added some hot pink tulle, big "blingy" brads, and some more twine.
Lastly, I added the felt flowers around each page.
I put this layout together a couple of weeks ago, and realized...hey, I can make those stinkin' cute flowers! All you need is some different colors of felt, buttons, string, and a needle.
First, cut 3 sizes of circles (they do not have to be perfect, I think they look even better a little wonky!). Then, cut 2 stem shapes for each flower and sew them together, adding the button on top! It's that easy! I wished that I had had a thimble when doing this, there were times when I needed to really push the needle through all of the layers. Here's what the back of the flowers look like:
FYI, 3D-dots held these flowers down, the best! I want to make some and turn them into clips for my little Stinkerbella's hair! Thanks for joining me today, and if you haven't ventured into making your own embellishments yet, I hope you will give it a try! <3 Kristy
February 15, 2011
Subscribe to:
Post Comments (Atom)


13 comments:
OMG!!!! This is the most precious layout EVER!!! xxxD
This is absolutely gorgeous! Love the tool and those felt flowers are beautiful thanks for sharing how to make them! I also love how you outlined the letters that's fantastic! Beautiful LO!
Hugs,
M
This is so lovely! And a perfect stage for the precious memory.
Love, love, love this layout!! The detail on this layout is simply stunning!! Fantastic job!!
Awwwww gorgeous. What a sweet baby and those flowers are beautiful. :)
Kristy, this layout is fabulous, and just so adorably sweet -- it's just wonderful!!!
And your precious little one, well I could just spoil her absolutely rotten...LOL!!!
You created just the perfect background for her -- all pink and frilly!
Wonderful job!
Kristy,
This is such a beautiful layout, and your daughter is gorgeous.
I love everything about it
Hugs
Stacy
The layout is awfully cute, but that little baby is just adorable. All around beautiful project.
Darling LO!! I love those little flowers... I think I will try a few! Thanks for reminding us how easy they are!
Barb :)
This layout certainly is glam! Love those flowers!
Awesome layout, and adorable little "Stinkerbella" lol. love the colors and the embellishments.
cathy
mexicopetshop@hotmail.com
love the layout very beautiful!!
This is just ADORABLE! Love the layout and your daughter is GORGEOUS! Thank you so much for sharing this wonderful page with us.
Post a Comment