


Hello, my Sassy friends. Today is my turn as a guest designer on She's a Sassy Lady and I'm so excited to share this card with you. My name is Cheryl from http://www.cherylswindow.blogspot.com/, but my friends call me Cher - so you should too!
Have you ever had those projects that you were able to visualize in your head and even sat down and designed, but didn't realize your design was illogical and flawed until you actually cut it and saw it in 3D? This little project was one of those! I had this vision of a little birdhouse-shaped card and sketched the card front out on my Gypsy. Then went into all the detail of copying, mirroring, flipping, welding, etc...only to find out that, duh, that isn't going to work. I wasn't even going to share this fact with you, because, of course, I want you all to just think I'm a genius like all these other talented crafters, but ....Hey, it might be good to realize some of us have those moments. Sometimes, I can design a project and it all comes together first try. Most of the time, however, I have at least 2 prototypes or drafts if it's something new, especially if I'm going to share my .gypsy file with you. I'm a very hands-on visual person and I need to see and touch my design projects most of the time to ensure they come out the way I want. I keep scraps for this and /or use paper I ended up not liking or extra from previous projects.

Here is just an idea of my beginning design flops for this project. Please remember that I did say I use scraps or discard papers. These colors and patterns would not have been a final project.

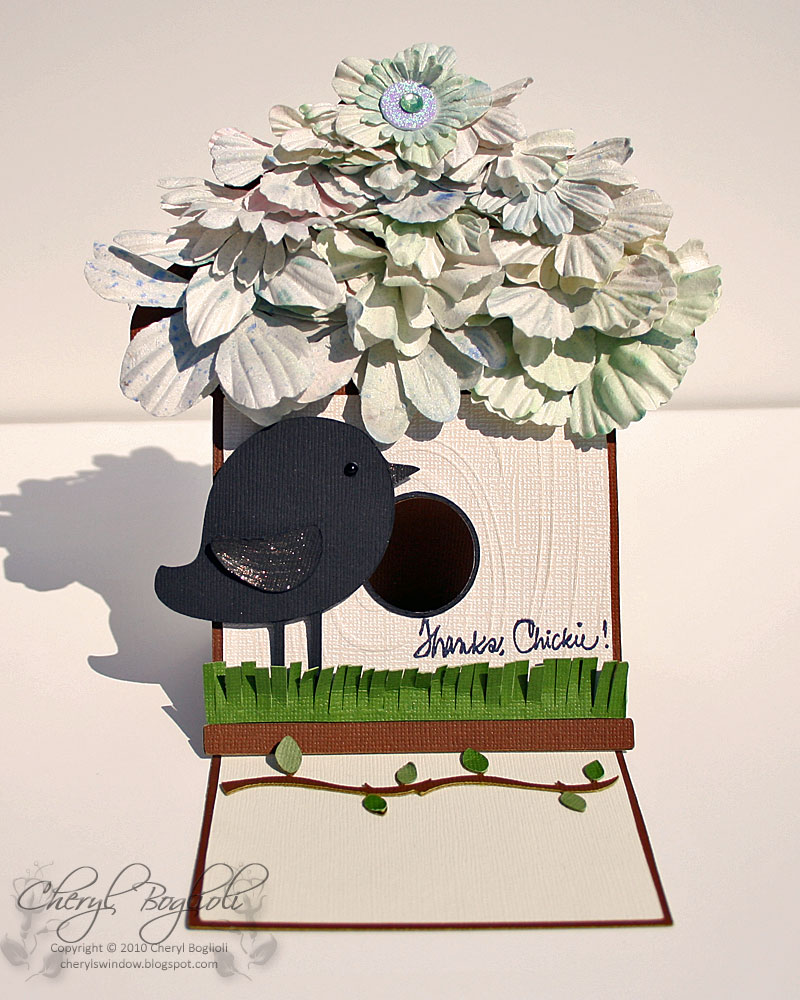
When designing this card on my Gypsy, I was able to use only one cartridge, Straight From the Nest. I used a square for the house background with a corner frame rotated an an angle for the roof line. I then added a small rectangle to the bottom of the house base and a circle as the hole in the birdhouse and welded all but the circle. The card base for the back was made by doubling the height of the birdhouse base rectangle. I used the branch and layers as a stop/rest for the easel part of the card.


I also created the strip for the grass layer and the leaves layer for the branch. You could just as easily replace this grass strip with a border of grass from this cart or any other cart with grass - or how about a tiny picket fence? This picture above is with the Preview "on".
If you do use my file, I added another page to include two identical roof top layers. Rather than the flower roof top, you could just as easily cut out the additional layer(s) to emboss or decorate as desired. With all of the flowers, I decided not to add another layer because of the additional weight it added to the top of the card.


Here are the images cut out with chosen papers set to align with images on mat.

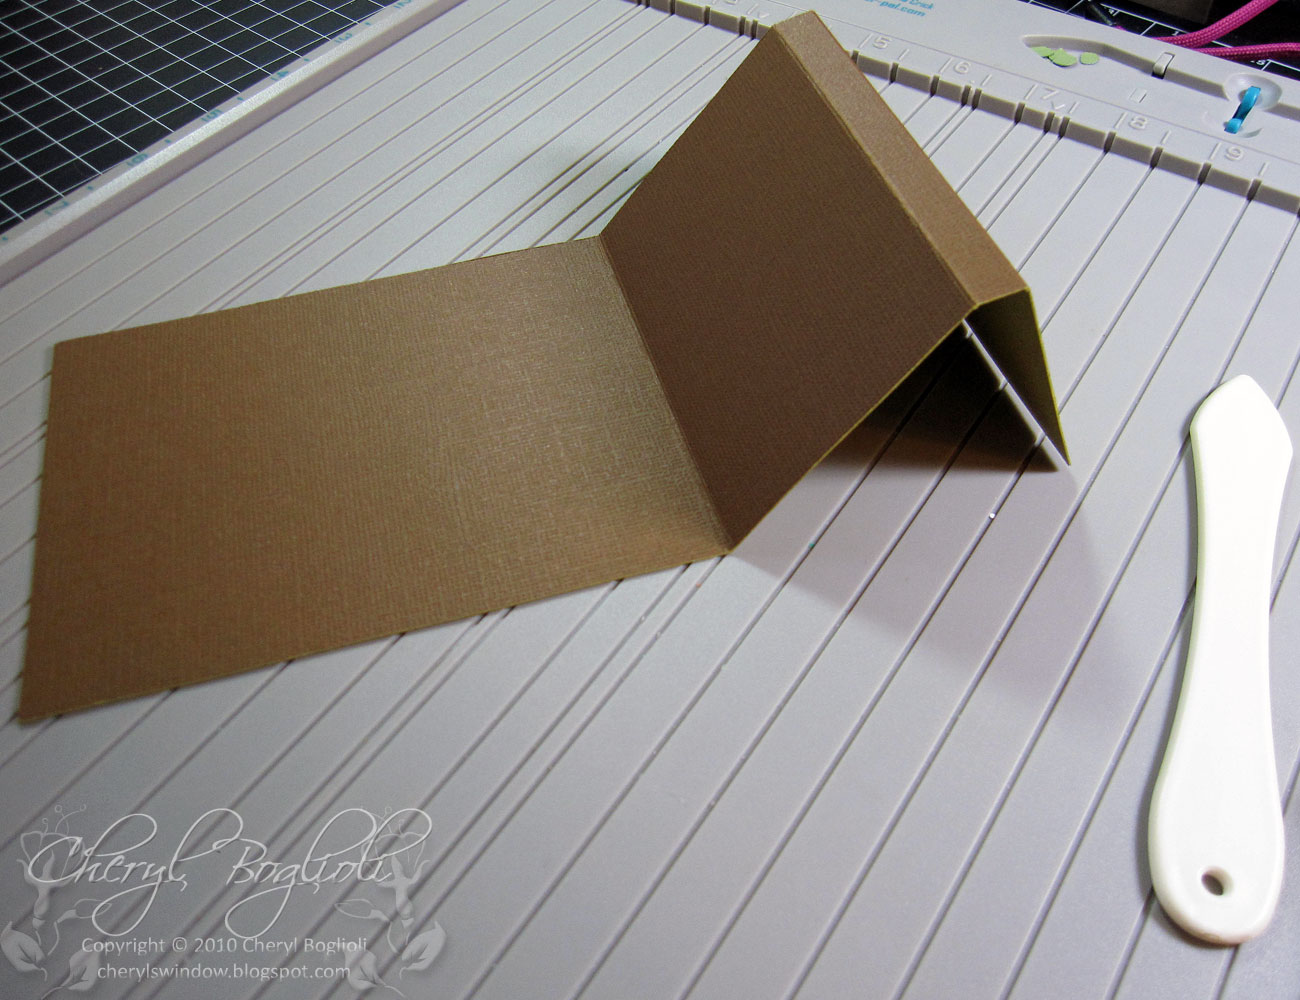
Take large rectangle base and score at 2 1/8", 2 1/2" and 5". The extra score mark at the beginning allows us to have a small ledge in the back to help balance the top-heavy card. The 2 1/8" and 2 1/2" scores will fold back and forth each way as the card folds down to close and folds up to sit open.


scissors that my LSS talked me into when I took a class there last week. LOL. Frivolous, but SWEET! Cuts so nice and makes perfect little cuts in NO TIME!
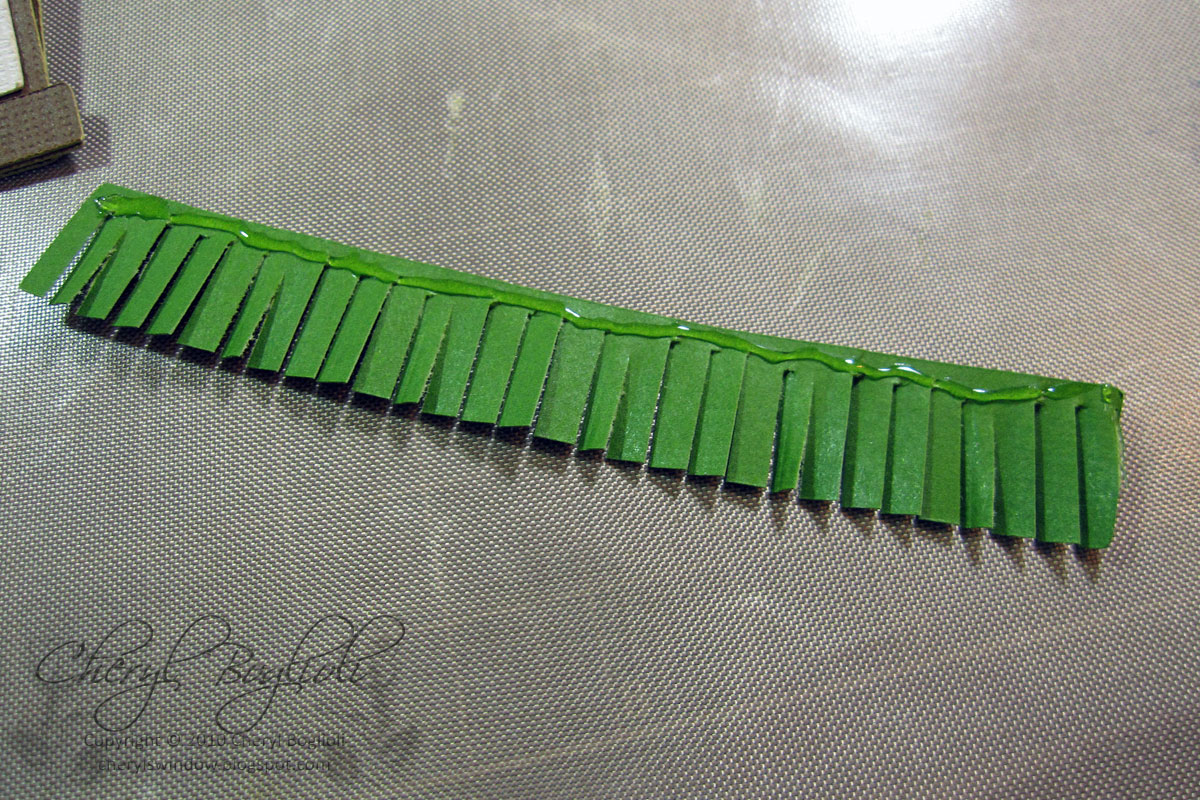

Glue on the grass and add some dimensional foam to the chickadee. I also added the black circle ring around outside of birdhouse door at this point and stamped my sentiment "Thanks, Chickie!" on the front of card. This stamp was from Papertrey Ink's Handwritten Notes collection. (I absolutely love this set for quick sentiments)


I used my heat gun to quickly dry the flowers. It doesn't take much at all, especially if you don't over saturate your flowers. I then started layering them from the bottom by folding them in half and applying with GlueDots. (I did use a variety of adhesives here, huh?) I started with the larger flowers toward the bottom and got relatively smaller towards the top. I chose one small flower for the top and added a little extra bling. Don't add something too heavy here. After adding all the layers, if you need to 'fill-in' a few spots, this can easily be done with a small flower folded and slipped between the layers.


Finally, add the little branch about 1/3 of the way up so that it acts as a stop for your easel card and so that it will still peek through the window when closed. TaDa! Isn't that adorable? And I'm so excited because it did turn out even better than I originally had envisioned. This is a little larger than standard card, but will fit nicely in a 6 x 9 envelope. So, one more time, here is the final card.
I would absolutely love it if you made this card and shared your version with me. If you would like a copy of the gypsy file, please leave me a comment and click HERE for the file. Thanks for spending a little time with me and I hope you enjoyed the chat. If you have ANY questions, please stop my blog and don't hesitate to ask.
Thanks for stopping by and for all your sweet words of encouragement.
Cher~


20 comments:
Cher, I am at a loss for words!!! This card is FABULOUS! So cute and the flowered roof is just too cool! The colors are perfect and nice to know that you too have a hard time deciding what to choose for color. B E A U T I F U L! I know everyone would love to get a card like this and it would be proudly displayed!! Thank you for joining us what a delight!
What a fantastic card. I am scraplifting this. It would look wonderful on the mantle as spring decoration. Awesome, simply awesome
super cute and so fun! Thanks for sharing and the great inspiration!
Cheryl rocks again! Wonderful, wonderful :)
uhhhhh I am so stunned at how cool this is that I don't know what to say...
how about this being one of my very favorite spring projects this year! I can NOT stand how smart ALL of the bits and parts of this is and IMO really worth the bumps in the begining....
this is an outstanding project!!!
Cheryl, what a beautiful card!!! And I love how detailed and thorough your tutorial is. I know Sheila is very proud to have you as a designer on her blog!!!
Hi, Sheila!!! Glad you had a great time in Chicago. Hopefully, the next time you're here we can get together and meet; although I feel as though I already know you. Let me know when you're again in my "neck of the woods".
I would like to thank you so very much for your entering your adorable card in the showcase, and for commenting on the mb. I have been MIA the last few days because I've been back and forth getting therapy on my hand. I am doing so much better and will be posting good news later today!!!
This is such a cute card, I think I will make one today for my sister's birthday and Mother's day. Thanks for sharing the file.
Wow.. what a fabulous card.. and thanks for the step by step directions! I have never tried one of these cards but now that I an see how it is all put together, I think I might just do that! Thanks for including the gypsy file too... that will help make my first experience a little less painful and a lot more successful!! Gorgeous card!
Barb :)
You know I am begining to run out of descriptive words to show how I feel about these creations. I just looked up "Amaze" at Thesaurus.com and this was the list of synonyms: affect, alarm, astonish, astound, bewilder, blow away, blow one's mind, bowl over, daze, dumbfound, electrify, flabbergast*, impress, move, perplex, put one away, shock, stagger, startle, strike, stun, stupefy, touch* I think this list pretty much describes how I feel about your card!
Cheryl, I love this card. You did a great job designing it. Shari (cricutrookie)
wow... this is just awesome.
This is adorable and oh so creative.
Wonderful sweet card! Thanks for sharing your techniques with us. Gotta go get me some of the core cardstock!
OMG!! This is just fantastic!! I love love love it!!!!!! :)
WOW!!!!! BEAUTIFUL
Just one word:- WOW!!! :-) TFS!
Wow what a great card! I like your directions.
Anita M.
What an adorable idea! I think I may be scraplifting this idea as I have a ton of flowers I want to use up!
Great card! I did't know there was faux bois cardstock that was actually embossed! Congratulations on your card being featured on http://3birdsdesign.blogspot.com/2010/05/bird-spotting-10.html
Post a Comment