


Hope you are having a GREAT DAY! It is Saturday and I am so excited to be able to show you some basic maneuvers on your Gypsy today. Now before we get started I want you to get comfortable, get your Gypsy turned on and lets create a box together! All you need is a cart linked that has a basic square on it like George, Plantin or you know even Gypsy Wanderings has a square. I will be using my favorite George and then Mini Monsters for the little pumpkin. Isn't this box adorable? And so simple that you will make one too! Now remember you do not need Tag, Bags Boxes or More or any other cart to make a box other than a cart with a square or a rectangle. Are you ready, well let's get started. If you get lost or fall behind just pause the video catch up and restart. These videos are to help you understand, and remember YOU WILL MAKE A MISTAKE and that is ok and is NORMAL, just go back and fix it and move one to the next step.
Now the first video we learn to make the base of the box, concentrating on the size, shape and weld for a perfect little gift box. In this video I refer to and X or Y axis, to understand I want you to look at your mat for your cricut on the Gypsy, one side will refer to X the other Y. So all you are doing when altering these numbers is lining up your artwork to a precise position on your Gypsy which inturn lines up to that exact position on your mat.
This second video takes us a little further in the base by adding flaps that will hold it together. You will also learn how to add to your welded item. Don't be aftaid to check the preview after you weld. what you see in red and black is going to be the actual cut.
This third video is completing the box and its lid and preparing it for a cut. Are you ready?

This is the paper I chose, don't you love it? This is DCWV Fall stack and I love it. The paper shimmers yet does not have glitter in it so it's safe to put candy in it. Now its time to cut so while the paper is cutting we'll answer a question I received in my email this week.
QUESTION: How do you move from mat to mat; small to large and large to small?
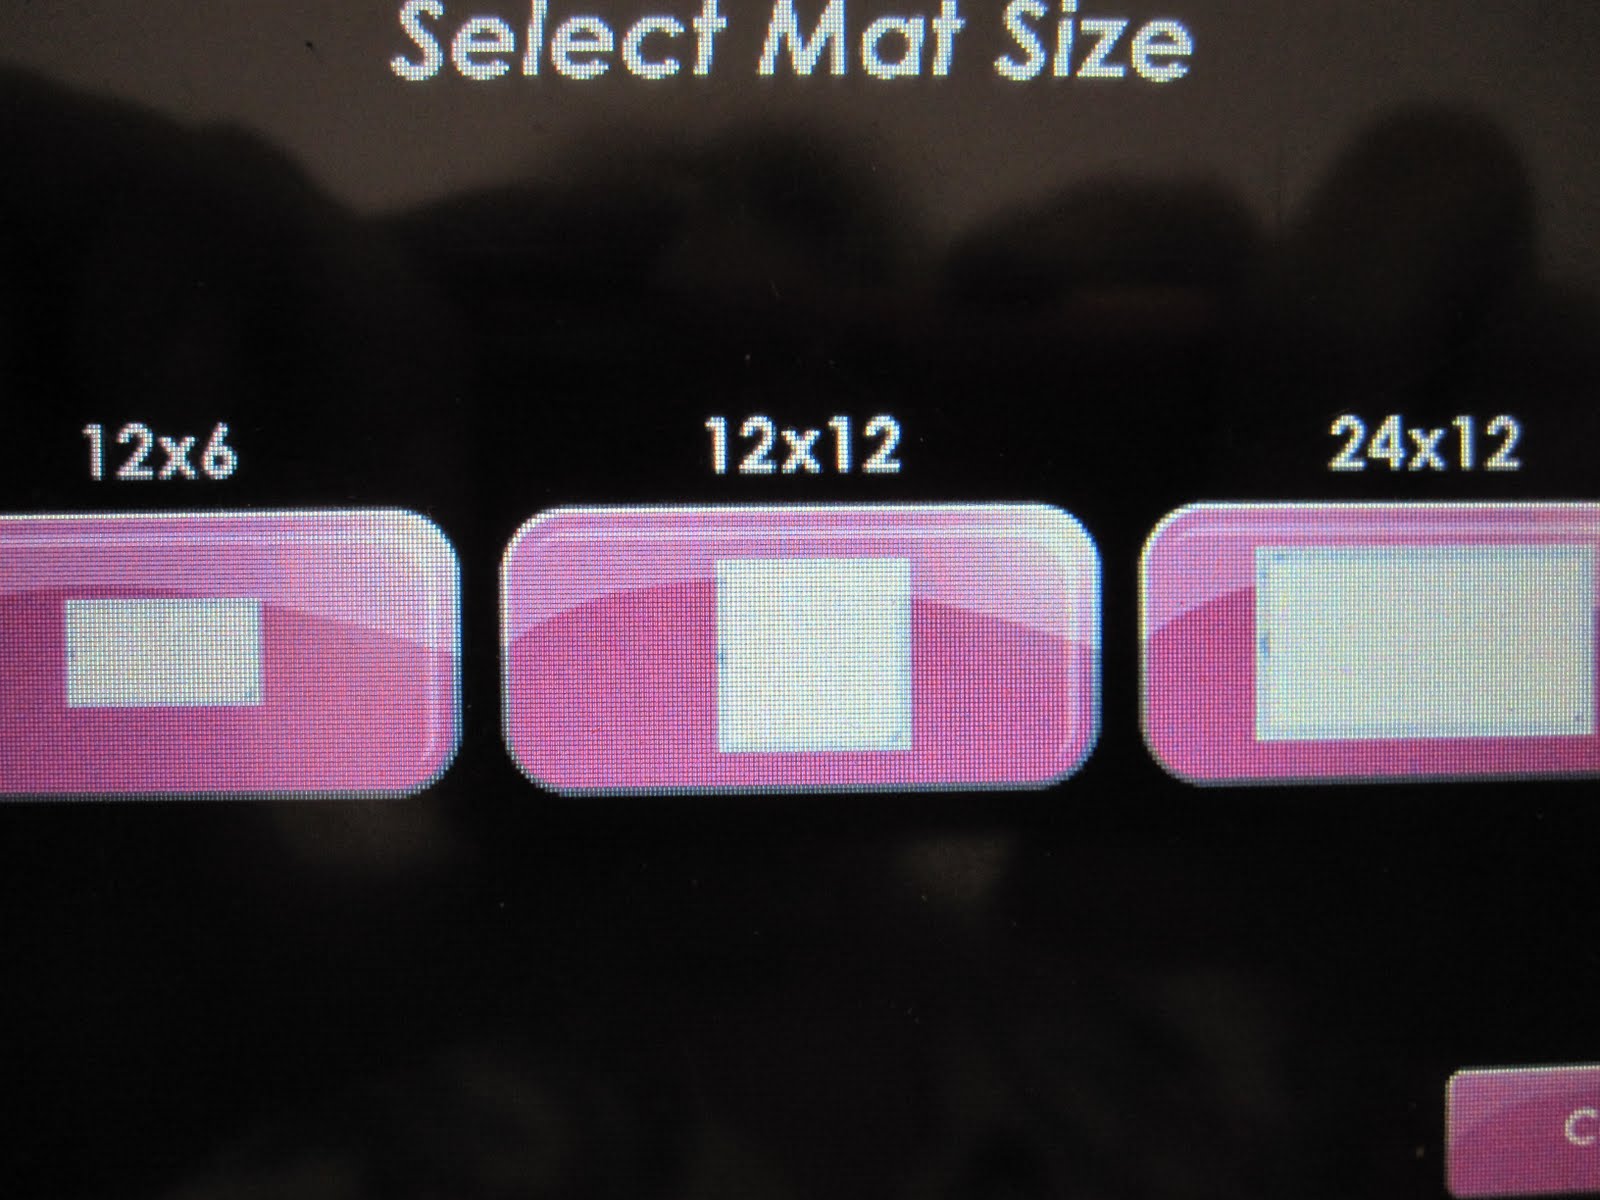
To find this screen just hit the little round silver button on the face of your Gypsy. Tap on the desired mat.

This is a photo of our project on a 12x24 inch mat. To make it smaller or fit it on a 12x12, first you need to position your design. Know that what you see on the right of the photo (the lid) will disappear from site if you change to a 12x12. So to prevent losing your hard work all you need to do is select the lid, then the plus sign, and when the next page comes up just hit copy and the lid will appear on your page.


This is what the two layers look like. To go to a larger mat just do the same thing and if you are like me you will delete any excess layers.

Lets put this box together. The first thing I did is scored all my pieces. I don't like the little score mark as I think that it looks tacky and weakens the paper. So just look at the box and score where they intersect.

This is the lid, see how nicely the little tabs fold in. Note, I am going to make the next tabs a little larger as I want more of an area as I think the box would be stronger. To do this just increase the width of your tab/flap it will not compromise the rest of your design.

See how nicely they will fit together. Now I used the DCWV and although I love that paper line it has a white core so I am going to ink the edges with my Marigold Distress ink (thanks to my enabler buddy - you know her as Makeupgirl217 she showed me all about inking!)

I made sure all my edges were done and I even inked the little pumpkin so I can make a little matching card!

I then used some acetate that was left over from the packing on one of my carts. I placed plenty of glue with my Glue Glider Pro around the pumpkin hole so no candy would sneak out.

And then positioned the acetate.

I can't believe it, my Glue Glider Pro went empty and I didn't have a refill! Love that Zip Dry Glue! I added plenty as you can see and waited for it to get tacky before putting together. It worked like a charm.

I then used left over scraps to make a little card. Didn't this little box turn out cute? I did make a mistake that I did not realize what until I looked over the videos.... Just before I cut I clicked the increase size button twice on the lid so it would be just slightly larger than the box. When I looked at the video I realized that I had already done that and checked the size! Oh well it still turned out great and I just adjusted back down for the next box.

I stopped at CVS Pharmacy on the way home for some shampoo and picked up a bag of Candy Corn. Don't they look yummy? Well, I was amazed it took the whole bag to fill the little box and I could have put more in it! This is one of my favorite candies for this time of year.

Then I mad e a little card with scraps. The base was a 3x6 inch folded in half, a 2x2.75 scrap of the lid paper and then the little pumpkin from the window that I inked the edges on. Isn't it cute?
So here is my little gift, a 3x3 inch box filled with yummy corn candy and a matching card made from scraps. How cute is that? And just as easy to make. Now I want to see yours. All you need to do after you make your little box is take a photo. It can be decorated or plain like mine, your choice. Then either post on your blog or the Cricut Message Board. After you do that click on the McLinky below and follow the instructions. It will link you right to this site and we can all see your newly designed box.
Be sure to return back next Saturday too, we will have another Gypsy Made Simple session featuring My Gypsy Woman! And remember if you have any questions email me at ShesASassyLady@hotmail.com and I will get back to you as well as run the answer on next weeks post.
Thank you for joining me today. I hope you enjoyed today's little project and learned something new at the same time. Thanks for your continued support and sweet words of encouragement. Your comments are what keep me sharing with you.


8 comments:
Cute-cute-cute, Sheila!!! The candy corns look yummmmmy! LOL!
Hugs, my friend!
This is fabulous, Sheila - love it! TFS
I have been following your blog for awhile now and thought it was time to send you a thank you. I have learned so much from your videos and you have made me feel like a pro on the gypsy device. Thank you for taking the time to do these and keep them coming. Now i am off to do today's video with coffee in hand. Have a great day!
Love it Sheila
Mylene
Great tutorial and sweet little box and card. Thanks for all your great ideas.
I love your candy box. It's super cute. TFS your great how to!
As always, your tutorials continue to inspire me to try new things! Thank you for all the time and effort you put into these fabulous instructional pieces! You totally rock!! :-)
I just love your pumpkin box Sheila!!! Your videos are so helpful!!!
Love how you used the extra piece to make a card :)
Post a Comment