


Here is my Inspiration Bear...

So let the teddy bear assembly line begin!!!!
- You need a bear (cut at 3"), glue pen, black scrap card stock, pink and tan color pencils, white gel pen, black sharpie

- Using the sharpie marker, fill in the nose, draw the mouth and the ear creases all following the cut lines on the die cut

- Flip the bear over and adhere a piece of the black card stock over the eye holes (tip: no one is going to see the back so you don't need to waste paper and cut another place bear in black unless you want a shadow, just use scrap pieces. I do this ALL the time)

- Using the color pencils to color in the ears and muzzle (tip: if you are doing a lot of die cuts that have little pieces, try to find another medium to create the details ie: pencils, markers, stickles, etc). I think the color pencils give the bears a softer, "fuzzy" feel

- Using a distress marker or fine tip marker, draw the muzzle line that you see on cuddly little creatures. and the while ink gel pen to for the eyes and nose. I think it gives the bears a little dimension (tip: the BEST for details is pigment ink white pen by Singo. I have tried others and they just leave me frustrated)


Here is my little example bear made into a card. He is the New Year Bear.


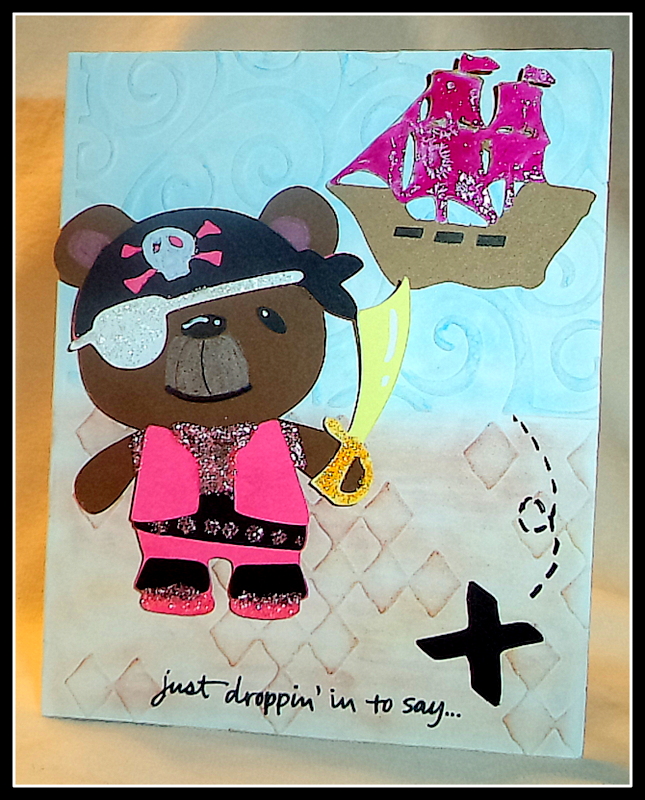
Here are a couple of other cards that I have recently posted on my blog for My Crafting Channel Teddy Bear Series.


Hope you have a blessed day and thanks for stopping by,


7 comments:
This is so cute Sandy- I'm lovin' all the bears I need to pull that cart out and make at least one.
you could enter this in my DL.ART Thankful Thursday Anything Goes August Linky Party. Have a great day
DIANA L.
dianamlarson.blogspot.com
Thanks so much for the tips! I just bought this cart and can't wait to try out the ideas.
These are all so super adorable! Love them little bears :-)
All your bears are so cute. Thanks for all the tips.
This is such a great post. What a fast and effective way to produce a bunch of cutouts for later use. TFS
Sandy your bears are too cute! I always cut extras too and "save" them for later use - problem is that my dtr gets to them before I do LOL. Thanks for the wonderful tips on decorating the bears.
Cute, cute, cute!! This is one cartridge that I don't have yet! I keep thinking that the clearance price will drop at my Walmart but I don't think it's going to so I'll have to bite the bullet and just buy it! Love those teddies!!
Post a Comment