


Hi everyone! This is Elizabeth from 217 Creations. I am so excited to be here at She's a Sassy Lady. I always seem to need boxes for gift cards. I am quite the lazy shopper when it comes time for a present. Gift Cards are easy and quick which more time for crafting (and shopping for crafty stuff). This little box is just perfect for a gift card and who would love to open something so cheerful looking?!
I started with my Imagine More Cards cartridge. This lovely box is apart of the bonus content on this art cartridge. The print that you see on the box is the default color and pattern. I love the color scheme on this cartridge. If you are picky like me I hate having white inside my purses and boxes for gifts so I started out by making this item double sided.

The first step was to take my white textured cardstock from Colorbok and do a full bleed.
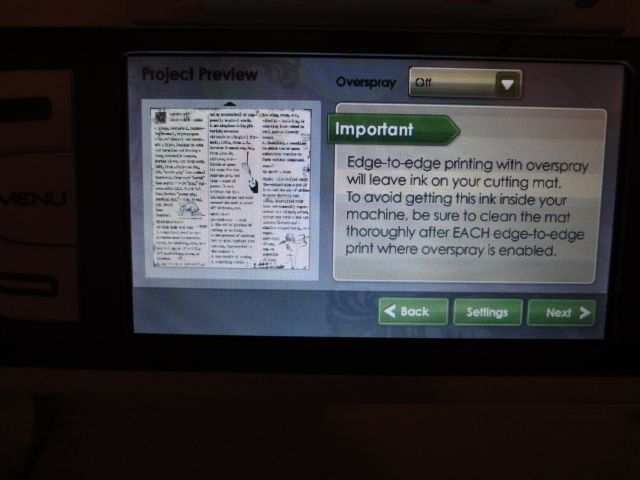
I chose to no have any overspray.
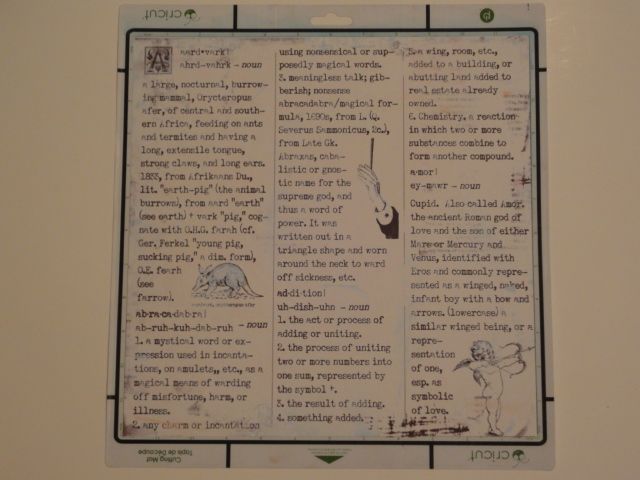
I chose this dictionary like paper for the inside.

Next I flipped the paper over to print and cut the box, making sure that the words were upright on the mat
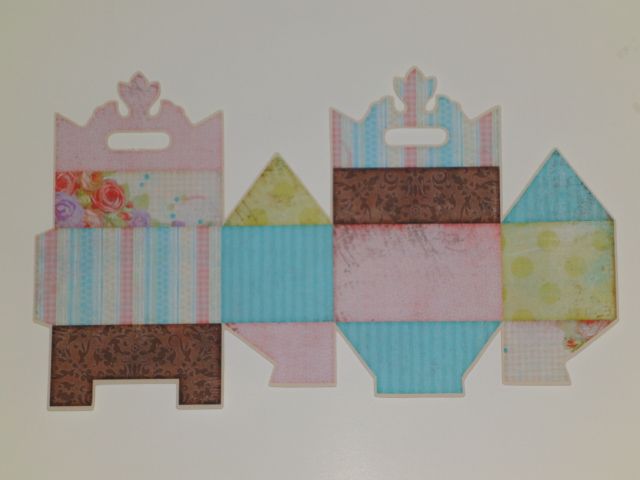
I left the box its default pattern and color. I chose fit to page.

Next I scored all the edges. I used my Score It board to make sure all the edges were straight and smooth. Just an FYI- There are no score marks on any of the 3D items from the Imagine cartridges that I have made yet. so I followed the edges of the colored pattern blocks on the paper.

Once my box lines were scored, I assembled the box. This is why I did the paper double sided. The inside of the box is finished too. It just adds a little touch to the overall presentation.
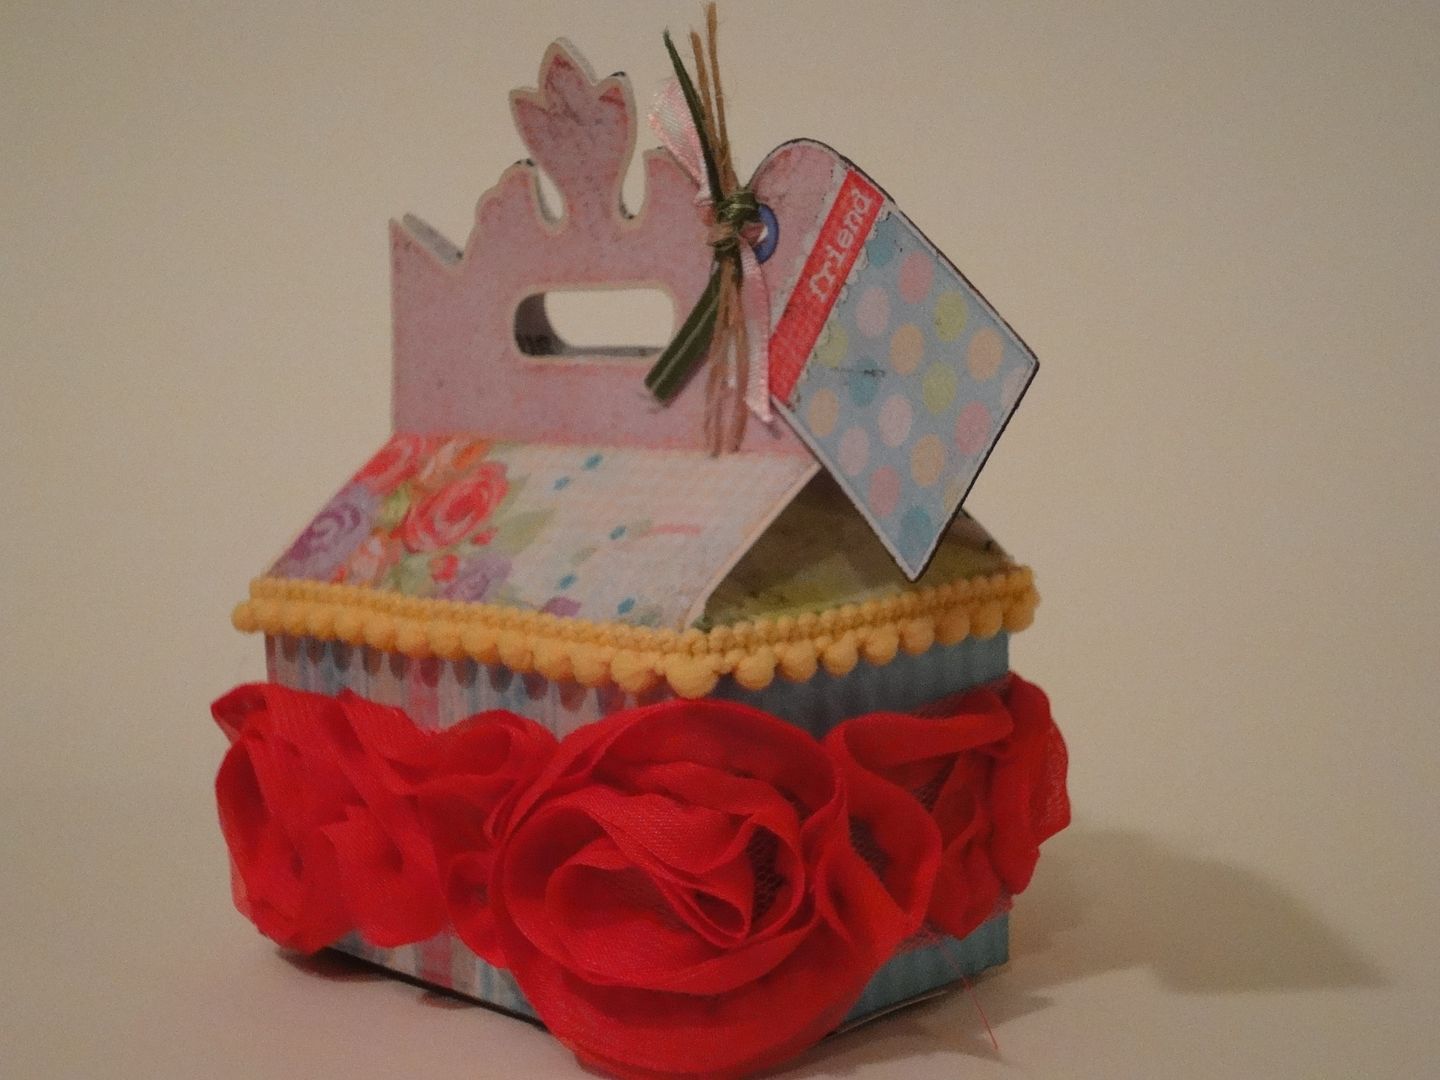
I took a small amount of American Crafts Rosette Ribbon and ran it along the sides with hot glue. Next I attached this mini pom-pom ribbon along the edge. I bought the mini pom-pom ribbon at Joann's. It is in the notions cut by the yard section.
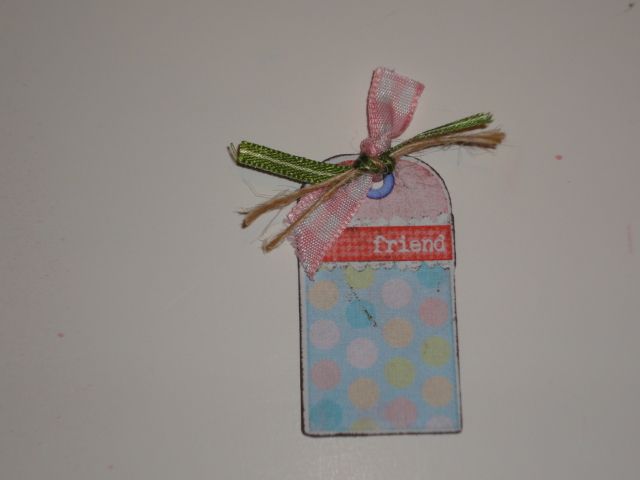
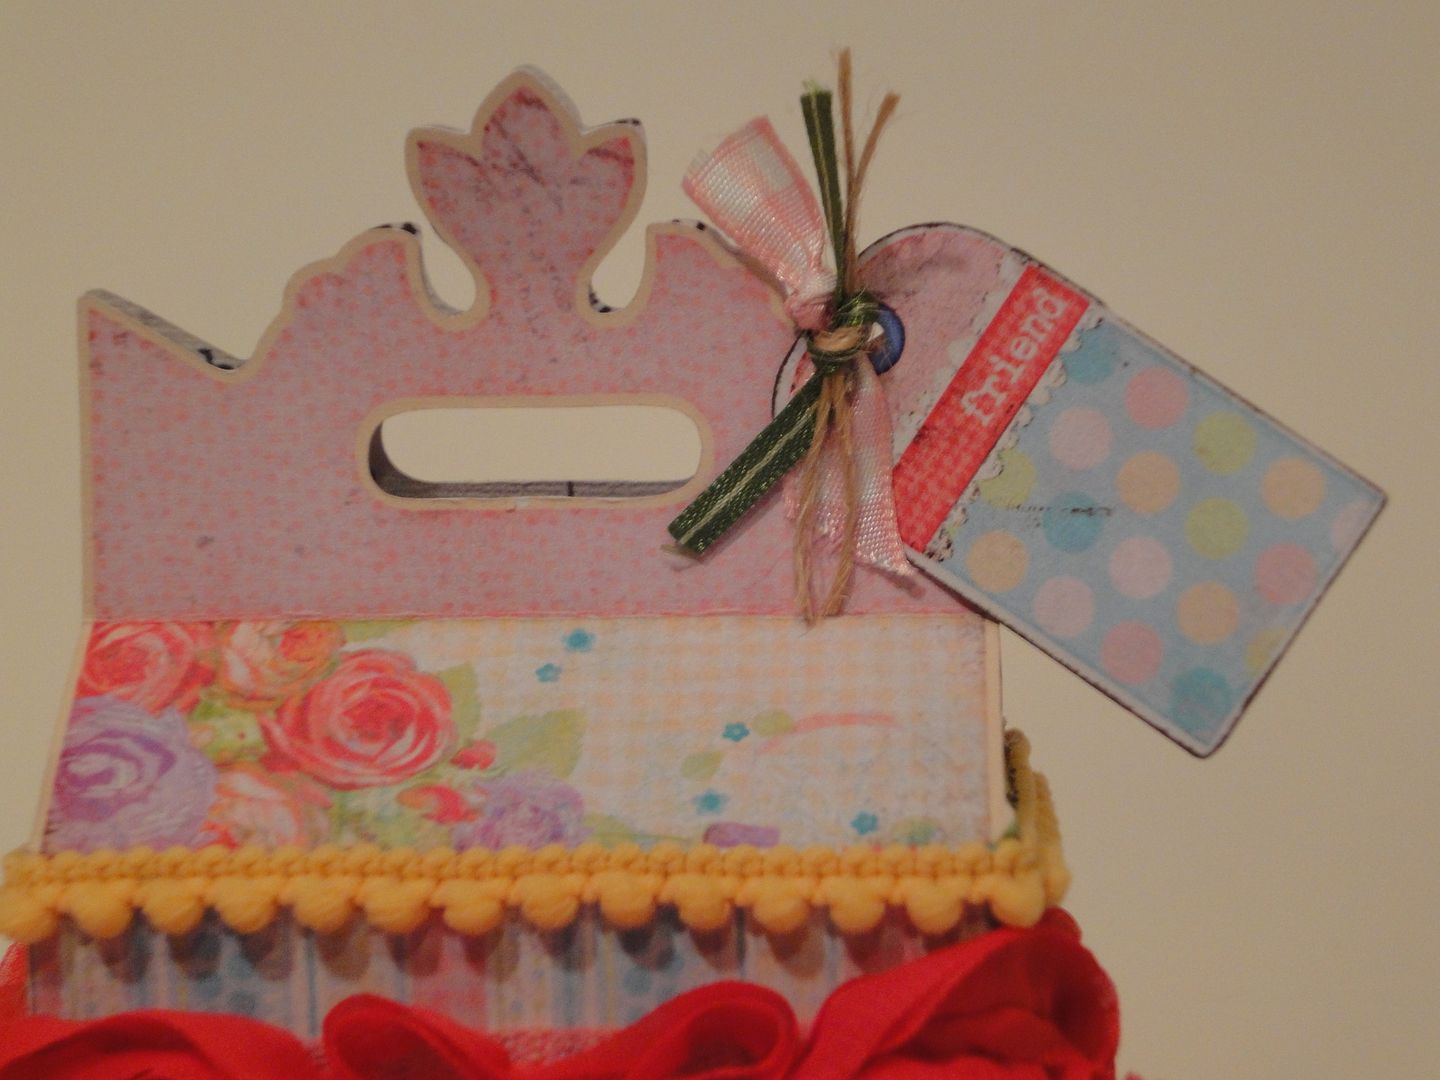
Finally I made this cut little tag from the same cartridge. It is cut at 2 inches. I punched a small hole in the top and threaded several ribbons though. I glued it to the side of the flap on the box.
I just love this project. I started work on more of them using some Christmas designed papers for the upcoming holidays. I also think these would make fabulous party favors.
I hope you enjoy this little gift box. As always, thank you for leaving comments and of course following both here and at my personal blog 217 Creations. Have a great day!


12 comments:
How cute is this? I love it.
Thanks for sharing
Stacy
Elizabeth this is a beautifl gift! Your right the colors are yummy. You are really good with your Imagine and make me want to get one. Thanks for sharing with us today.
Wow!! I love this project!!! It is so beautiful!! I was looking at this cut the other day and thought, just like you, that I wouldn't want the inside to be plain white - I love the pattern you chose! Thanks for sharing your awesome talent! It's always a treat to see your creations!!
just gorgeous...love the inside too. TFS you always come up w/awesome creations.
This is adorable. LOVE IT!
Wow!! this mini little box is adorable! I love all the things you can make with the imagine!
barb :)
Cute!!!
P.S. You know I love boxes!!!
This box is sooooo cute!!! Don't tell me I NEED another Imagine cartridge!! My checkbook is hurting!!!
Very cute project. Thanks for sharing!
Very creative to print the inside of the paper, I too love boxes and bags... :( too bad my Imagine got sent to the hospital!
Super Super Cute, now I need this cart too!!
Brilliant. Love the idea of printing both sides for your projects and your box is absolutely adorable.
Post a Comment