June 30, 2010

REJECT PILE! OR TO THE SALVAGE BIN

Having a blog really is a lot of fun. ShesASassyLady keeps growing each week and it's because of the awesome projects the Sassy Designer team shares with you daily. But you know what? It's not all peaches and cream! We make bloopers and lots of them. I thought I would just share a couple of mine with you just from this week!
As you know I have started the weekly Card Kit Giveaway and it seems very well received and I am always amazed at the ratio of file downloads to actual entries. The downloads always out number the entries by at least double, sometimes triple. Guess that means I need to do a better job choosing my paper! I try to Sass it up but I have learned to really think out the colors before cutting. I will try harder and you will see the difference in the future.
This little Froggie is adorable and is a salvaged design! He won't be a part of the card kit giveaway at this time. Who knows, maybe with a complete over haul! You see first I designed him way too large for an A2 card. You can see from this photo that he is almost 11.5 inches high. I know better yet for the life of me I can't tell you what I was thinking. Then I choose this beautiful paper and figured I would place his base body layer on that so you could see this lovely green at the base and was I shocked when it cut the exact same size as the base without offering a smidgen of paper. This gave me two extra pieces. I also was going to place ribbit inside the card but made that almost as large as the inside of the card. This offered no room for a message to the receiver. Before cutting I made size adjustments and actually cut 2 sets. My color choices were fine and I actually bagged the card set thinking, yup I can offer this.... Then when I started putting it together I knew there was no way this card would ever make the cut so I decided the best thing to do is SALVAGE IT as it looked OK. It was just too much work to get it to line up properly and a Sassy Giveaway should be easy for the receiver to put together. GIVEAWAY REJECT.


Here is another SALVAGED card. I cut out this project that I designed and the file was fine but the cut.... it didn't do very well at all. You see I didn't think it out and used a light textured paper on the parts that I should have used card stock on. So I had to cut another paper to back the paper that I chose. Then my first color choice just faded into the background so I used some scraps as my first color choice turned out looking terrible. I should have measured the scraps better as my body cut was missing a few pieces... legs, antler, belly. Thank goodness my little caterpillar had an outline to cover some flaws. I even pieced  it together with a pink post it note on the back! The card turned out cute but was a GIVEAWAY REJECT.


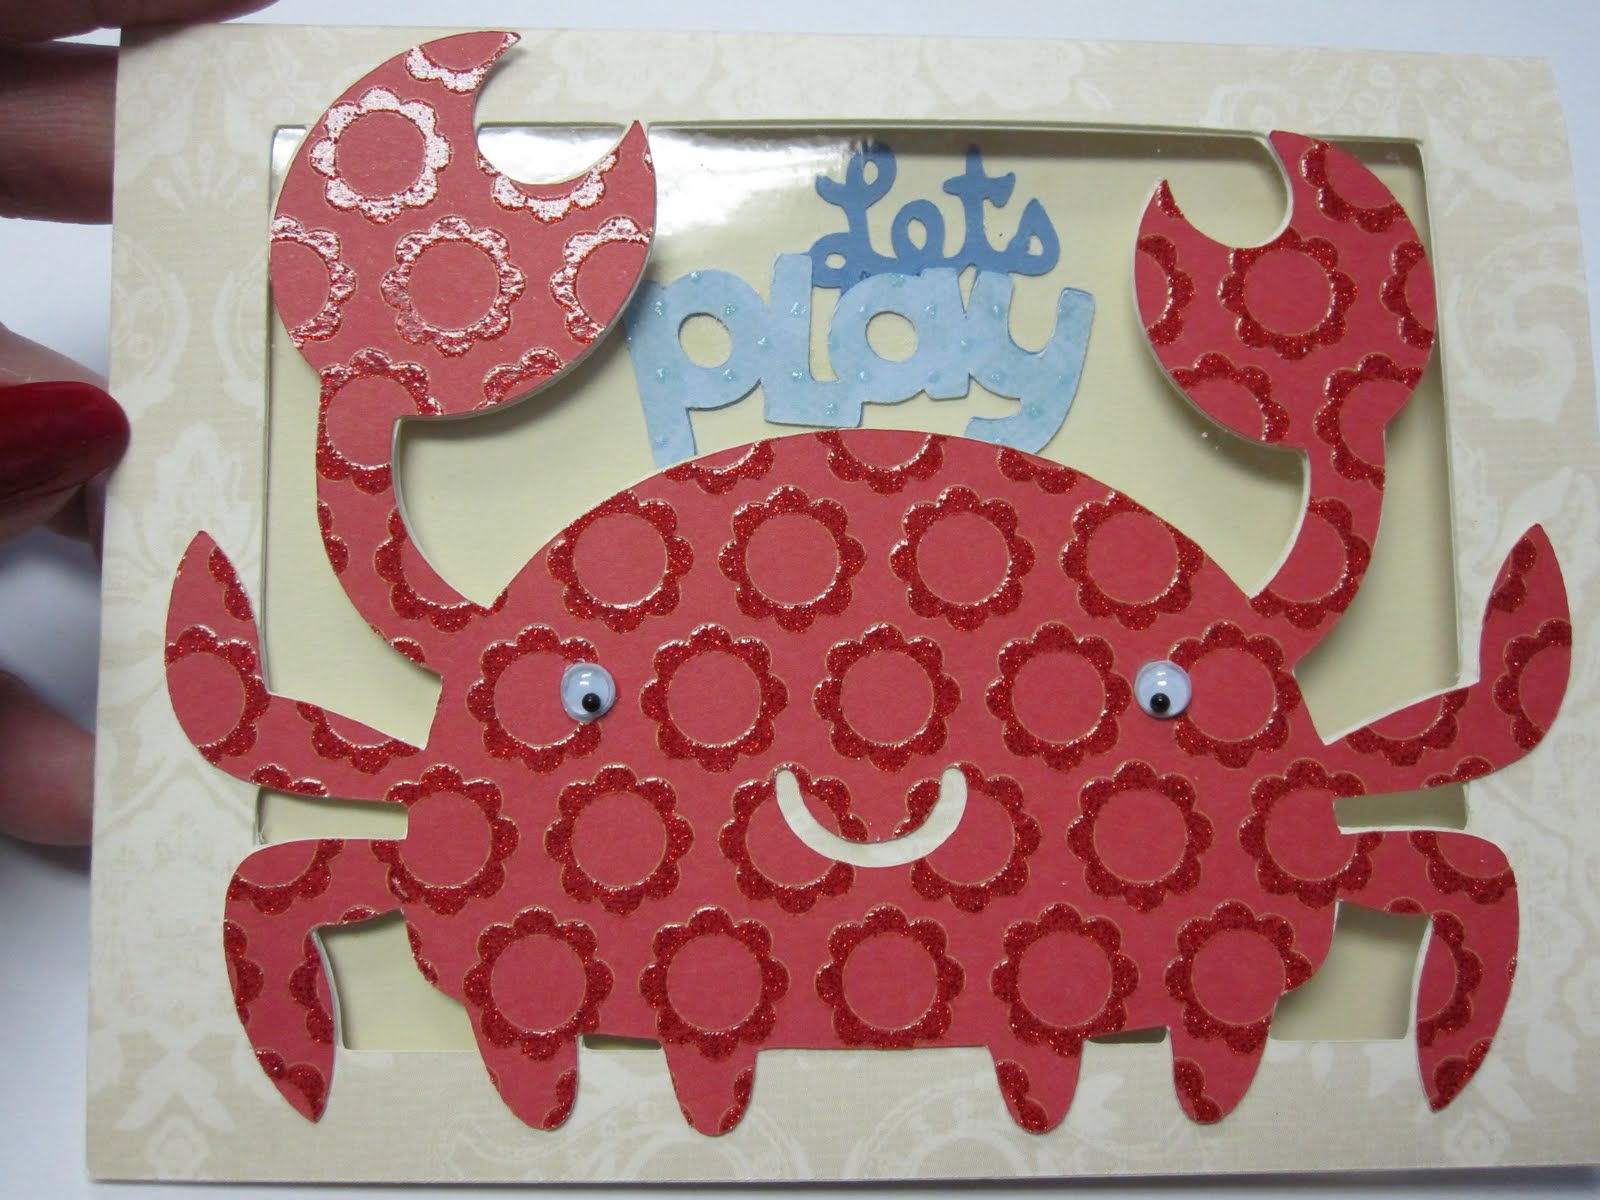
This one is a TOTAL REJECT at this time. I am going back to the drawing board with it as it was not even salvagable. I love the design so it will be reworked. I welded the words together missing the bottom of the R and A. The card would never hold the open and closing multiple times before it just fell apart. I thought of backing it but the fold itself was too weak so I will work on this in the future. It will say don't be crabby! And we all know people we can give this card to.


I cut all of these bloopers in one day! But the great news is I also got a good project completed.... a set of 4 note cards and matching envelopes and a successful giveaway card that is scheduled to run on July 12th, so be sure to look for it. (I will confess I had a blooper on it as I inked the wrong side so I just cut 1 little piece).  And I walked away with 4 new cards that I will keep for myself as they did turn out OK they just took the long way around and weren't good enough for the weekly giveaway!

My whole point for this post is to SALVAGE what you blooper and don't be afraid to show it off. If I didn't show you those ripped off antlers you would never have known. Look at the photo above left, see it is perfect. Hold your head up and be proud of the project you made because no one will know that that is not how you originally designed it!

TIPS To Remember-
In no particular order.
  1. Choose not only the color of your paper but the weight. It is difficult to make a light weight cut look good when you use a pop dot!
  2. Keep plenty of stickles on hand to hide mistakes. Over spill of glue is hidden easily with stickles.
  3. Make sure you have all your supplies as if you make a blooper you are more likely to toss than salvage if you don't have all the supplies needed to finish.
  4. Measure while designing.
  5. Make sure you have all layers and not duplicates of the same.
  6. Measure before cutting.
  7. Check your paper position on the mat before cutting... you could have it upside down.
  8. Further clarify your load mat and paper by keeping the Gypsy mat in front of you and pay attention to the arrow on the Gypsy and load the paper on the mat the same way.
  9. Make sure you have a good blade in your Cricut.
  10. Before changing your blade first check it by removing the housing and then push down on the bottom so the blade pops up and blow out all the excess debris. Often times this will make for a better cleaner cut.
  11. If using a Gypsy make sure all the carts you used are linked.
  12. Make sure you insert your mat in the right direction.
  13. Make sure you use the right glue/adhesive for your project.
  14. Store your little pieces in a baggies or on drywall joint tape so they don't get lost.
  15. Test cut with maybe a cheaper but heavier cardstock like walmart's especially if you are cutting intricate cuts and also when the cuts go lower than 2-3 inches.
  16. Use a better quality paper while doing the actual cuts.
  17. Always keep the speed at low as the Gypsy does make the cricut go faster.
  18. When using a Cricut Marker be sure to place a small sheet of paper under the blade housing so your designer paper does not get marks on it.
  19. When using a Cricut Marker be sure not to move the blade housing while changing from the blade to the marker in the middle of a cut as your marker lines will not line up to you cut lines.
  20. When using a Cricut marker remember not do remove your mat between cut and write.
  21. Make sure your cut has gone through before removing from the Cricut so that if you have to make a second cut it will line up properly.
  22. Always make sure your mat is clean and free of particles before cutting to avoid ripping or jumping on the paper.
  23. When cleaning your mats I find that Dawn and a scrubby seems to work the best to remove built up glue. Then just apply the Zig two-way glue and let dry overnight.
  24. Invest in Drywall Joint Tape at Walmart for around $4 you can take your headings off your mat if they ar not welding and place them on your layout while retaining the correct spacing.
I hope you enjoyed todays Blooper post and I sure hope these Tips help you while you are creating in the future.... I am sure some you know already and have learned the hard way like me! When making a comment if you would like to add a tip of your own it would be greatly appreciated by all.
MyFreeCopyright.com Registered & Protected
I am always encouraged by your sweet - sweet words. Your comments inspire me to keep scrapping and sharing things with you.
signature

June 29, 2010

The Easiest Box Ever


Isn't this little box just too cute? And so easy you won't believe. All you need is Tags, Bags, Boxes and More and a Cricut and you are good to go. I used the new K and Company 12x24 patterned paper and went for the largest cut I could fit on the paper.It doesn't matter if you use just your Cricut, CDS or just the plain cricut this cut is perfect on the cart.
I have everything loaded on my Gypsy Woman. The final cut produced a 3" square box.
After cutting be sure you score and fold your cut.


I wanted to see how it went together and decided I did not like the white peeking out of the flower on top.
So I just took a minute and inked the back of the flower so it had more of a finished look.
While that was drying, I decided I better pack my bag of tricks as I needed to get to work. My lunch buddy is covering for her boss so I have been spending my lunch hour working on projects. I grabbed the left over paper so I could fancy cut a couple of flowers and stickle them.
It is getting a little snug in there!
And the little pouch is over stuffed..... but the good news is I can scrap on the run.
I stickled the center white and liked the way it looked so I continued.
See the difference in the flowers and it took less than 5 minutes.
Pulled the box out of the bag and in less than 2 minutes it was a box.
I used pop dots on the flowers.
This is how it looks from the top, so pretty you really don't need to even decorate.
Now wasn't that easy? Less than 5 minutes its cut and another 5 minutes it is done and decorated. This is a must have cart for everyone as we all have those last minute gifts that we want to look special! And you can even pre-cut a few in different color and leave folded flat like I did in my bag. 2 minutes after that point is less time than finding wrapping paper and ribbon!
MyFreeCopyright.com Registered & Protected
I am always encouraged by your sweet - sweet words. Your comments inspire me to keep scrapping and sharing things with you!
signature

June 28, 2010

Enter To Win This Cute Little Crab

Isn't he handsome? He wants to come home and play with you! All you need to do to enter is leave a comment!
I love these little window cards that offer just a little peek of whats happening on the inside. This card is pretty easy with the Gypsy file that I am sharing with you.
As you can see this is a real simple cut and only 2 pages. The second page is for the 2 inside pieces; the acetate and the section to write on.
Above you can see how I score and fold the card and then trim the inside fold away so that the card fold securely.
These are all the pieces in the kit that you will receive if you win, and it does come complete with his little eyes. All you need to do is supply the adhesives and a little time.
I looked around and try as I might I forgot my glue Glider Pro at home and was not going to use glue on the window and go through that hassle again. So I improvised.
See, I used medium sized glue dots and they held perfectly! Then I used the Zip Dry glue along the paper edges.
I added glue to the sentiments area and attached to the inside bottom.
And then positioned the Lets Play within the window, not at the center of the card so it looks great when you are looking at the card while it is closed.
Notice all the room you have to write a little note.
Isn't he handsome?
This is looking down at the card while it is standing on a table top.... you can peek inside without disturbing.
And a close-up of the awesome paper from DCWV! Well I sure hope you enjoyed this little project. Do leave a comment for a chance to get this cute little card kit mailed directly to your home. You get an extra week to comments as I am on vacation so this card kit is a 2 week draw. All you need to do is make a comment by Friday 8PM on 7/9/10 and watch for the announcement. It's that easy! But at ShesASassyLady, everyone is a winner because this is the Sassy Crab Gypsy File for you to download.
MyFreeCopyright.com Registered & Protected
So be sure to leave a comment and make sure I know how to reach you. I am always encouraged by your sweet - sweet words, they inspire me to keep scrapping and sharing things with you.signature

We Have A Winner!

Congratulations to VERONICA A you are the lucky winner of this Get Better Gator.

VeronicaA said...

Gotta love that gator! That get well card is adorable. Your projects are fabulous. Thanks for sharing.
Veronica

All you need to do is email me at shesasassylady@hotmail.com with your name and address and I will get this cute little guy on his way to your home. You have 1 (7/5/2010) week to claim your prize or another winner will be drawn.

June 25, 2010

Busted!!!!

Good morning and Happy Friday! It's me, Cheryl from Cheryl's Window, again and I'm making another Guest Designer appearance here on She's A Sassy Lady today and am excited to share my layout with you.  It's a simple layout when you first look at it, but it has some intricacies which our new Gypsy update made possible!  I have loved my Gypsy, but now you might say "I'm in love" with my Gypsy lady!   I'm so happy with the possibilities now, that I can't imagine how they plan to make it much better, though I won't be surprised when they do!
This year, one of my goals was to scrap the everyday stuff; not just the events or the happy times.  Well, my dear daughter got her first speeding ticket.   It certainly is not something we want to celebrate, but was definitely a learning lesson for her.  It's going to take a whole biweekly paycheck of hers to pay for her ticket and she now has to add driving school to her schedule.  She was also grateful that she came home and told us about it, because I received a notice from the Police Department a few days after the citation.   She would have been in SO much trouble had she not told me about it.   Of course I wasn't there to get the picture either, so I improvised and made her go outside and park on the side of the street while I tried to get the angle right and take a picture of her reflection in her sideview mirror.  I thought this picture did well to add to our story. 

I created a basic sketch of my layout on the first page and named that tab DesignTemplate.  You can now name your tabs on the Gypsy by holding your stylus on the tab until a small pop-up window appears giving you the option to RENAME or DELETE the tab.    I was able to place most my elements on this tab and then copy them to various other tabs and then divide them by color.  I personally found it easier to divide it by design element originally to make sure I had each layer needed since this was a heavily layered project and then copy and divide by color and renamed the tabs to the color I wanted to print.  You can see the different tabs and their labels on one of my screen shots. 
I wanted to keep the colors very 'comic' book stylized so I kept to black and white for the most part.  I added the red for a pop of color and the overall colors worked well with the subject matter too, don't you think?  

As for design, I was able to personalize my images by using the HIDE CONTOUR feature on my Gypsy.  One example is the Speed Limit sign.  The sign originally says SPEED LIMIT 50.  Well, dearest Sage was busted in a 45 zone.   By hiding the 50 and replacing it with 45 from Sans Serif (any san serif font should do), I was able to personalize our sign.  I also used the Disney Cars cartridge and was able to personalize these images too.  I flipped the Sheriff's car to be facing the same direction as her car and used HIDE CONTOUR again to remove the little car's smile.   I added a frown with a parenthesis from Gypsy Font. 

Once I had all my pieces sized and organized by color in my Gypsy, I was able to start drawing, cutting, and assemblying.  Yes, I used markers and drew the road on my background cardstock.  It provided such a great effect.  Let me show you how I used my markers.

I chose the road track piece from the Cars cartridge and copied and then rotated each piece to create the road strip as desired.   I welded all pieces together and made sure they were lined up smoothly.  I then grouped all pieces together to create one group so that I could copy my entire roadway to a separate tab.  I loaded my white background cardstock and my black Cricut Marker.  One tip I picked up quite a while back (I am so sorry I cannot remember or find where I got it from) is to put a piece of tape on the marker so that you know which one you've already started using.  See pic below and you can barely see it at the top of the marker.  

I'm sure you've seen the tip to put a post-it note under your blade carriage before installing your markers.  I have accidentally marked paper and my Cricut by forgetting this, but now I keep a post-it note on the inside lid of my Cricut and replace as needed.  After installing marker, change your pressure to 2, load your paper and choose cut, and then watch it draw rather than cut.

Here is the road all drawn out. 

Next, I cut out all the remaining elements by color and started assembling the pieces.  I'll warn you now, many of these pieces were REALLY little.  Some of the really small gray pieces were too small to cut well or glue down, so I improvised with a metallic silver pen and I liked the way that came out even better. This was for the little car striping and fog lights mostly.  All other pieces and colors cut very well.  I think my gray paper was just too 'soft'.  I find that some Bazzill cardstock has too loose of fibers to cut intricate cuts.

I added a few dimensional squares to pop cars off the road just a bit.   I have wanted to use these images on a layout for a while and love how cute they came out.  The layers really make a big difference and truly bring these character images to life.  They do take a little time to assemble, but are stinkin' cute!!!   I also adhered only the sides and bottom of the photo mat to the paper so that I could slide the citation behind it.

After putting it all together, I journaled around the edges with short phrases of lessons Sage says she learned and thoughts she had while getting her citation. 

So, here is a little bit of  real life happening and lessons learned.   Again, it wasn't a great event or a celebration, but I hope it's something Sage doesn't forget and now I've been able to capture that for her to share with her future teen driver(s)! 

I hope you enjoyed this little post and found a bit of inspiration or a good tip.  If you'd like the file, please visit my blog.  You can scroll down to this part of the same post for a link to download the gypsy file. 

Thanks for stopping by.

Cartridges Used on this project:
Street Sign for Title
Disney Cars
Sans Serif - 45
Gypsy Font - (