


Do you like it?! Would you like to see how I made it?! Well... before I start, I am just going to go ahead and apologize for the quality of the photos. I enlisted the help of my teenage son since I was using a glue gun and couldn't take the pictures while making the rose. Some of the pictures were too blurry to use but I think you will get the basic idea......

You will need a circle punch, a glue gun and some satin ribbon that does NOT have wire in it! Punch a circle from a coordinating piece of cardstock.

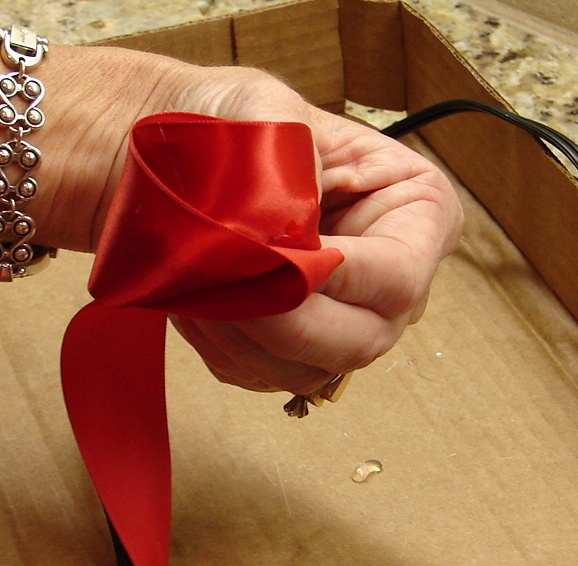
Start by rolling up a small section of the ribbon, then place a small amount of glue in the center of the circle and place the rolled part of the ribbon in the glue.

Continue to put down a small amount of glue using your hot glue gun while wrapping the ribbon around the circle. You will want to wrap this loosely. If you get your layers too tight, you are going to lose the look of the rose. The picture above gives you the general idea of how you should wrap the ribbon.
When I get to the end, I cut off the remaining ribbon and tuck a small piece under the circle. I like to turn the ribbon at this point so that it looks more like the outer layer of a rose in bloom.

Now... this is the fun part!! I used a long lighter and I brought the flame close enough to the ribbon to start to melt it. Be careful though... if you get too close it will burn and could even catch fire!!

If I am using a thick ribbon, like I did on this rose, I also take the flame to the side of the flower so that the sides melt a bit and curl in like a real rose petal would.

I decided to place my rose on a card. The paper is from My Mind's Eye. The chipboard piece was something I had laying around my room along with the ribbon. The leaves for the rose were taken from some silk flowers I had in my stash. the leaves were huge so I cut them down to fit the size of rose I made! The fun little gems on the chipboard were done using my iRock tool!! I love my new toy!! I hope you enjoyed my tutorial today and that this little project gives you one more embellishment that you can make yourself to add to your cards, layouts and other altered art projects!!


15 comments:
this is fabulous! Can't wait to try it. Thanks for sharing!
This is such a cool technique especially the last bit of taking a lighter to it.Have to try it soon and keep fingers crossed that I do not burn down the house
Beautiful!!!! :)
awesome rose! and card. all the details are fab!!!!! I can see it on a hair pin too. wink)
beautiful rose & beautiful card! TFS!!
Barb this rose is GORGEOUS and wow I would have never thought to use fire! I love the effect and look at the beautiful card! Thanks for sharring this wonderful technique.
Such a beautiful rose! Thank you for sharing.
That's just gorgeous! I need to try it!
What a beautiful rose. And how sweet of your son to take the pictures for you. I love the card you put the rose on also.
Your rose is absolutely beautiful!!!! Thanks for the tutorial!!
The rose is gorgeous and looks so easy to make! Thanks for sharing!
Your rose and card are absolutely beautiful. Great instructions too. Gonna have to try this on one of my cards soon:)
Thank you for the tutorial. Your rose is gorgeous.
Beautiful flower and card! I will have to try!!
Gaby
gabycreates.com
Great idea! TFS!
Kristy
craftin-on-my-door.blogspot.com
Post a Comment