


 Hi all,
 I got a new toy this week. It's the airbrush for the promarkers. So of course I had to have a play and if's fab. I thought I'd go through the steps so you could see how I got to the cards.
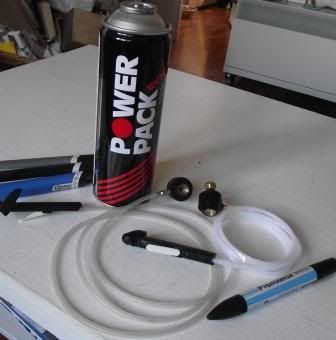 Here's the airbrush. I already had a older version but hadn't played with it so this was all new to me. The letraset one comes with a promarker in skyblue. You do need to buy the air cannister for it to work.
  I'm not the best at drawing clouds and I really wanted the option of having different styles and sizes of clouds. I used clipart in word to make the above page. I then printed it out.
  I then cut the clouds out. It didn't matter about the sun etc as I cut around them.
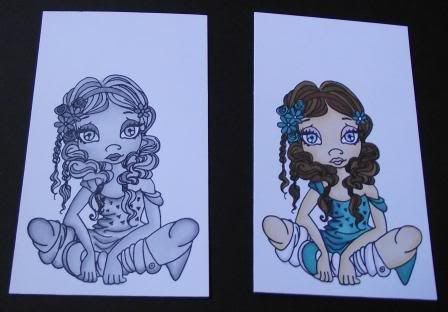
I then stamped two images on my usual card for stamping and coloured them in. They are both using Promarkers. This is the first time I've coloured an image in just greys.
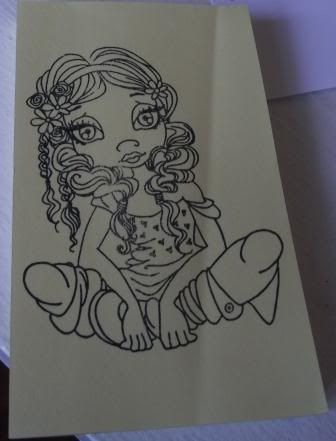
I then stamped another image on a post it note. I made sure the image was over the sticky part as this will be my mask. I then cut it out.
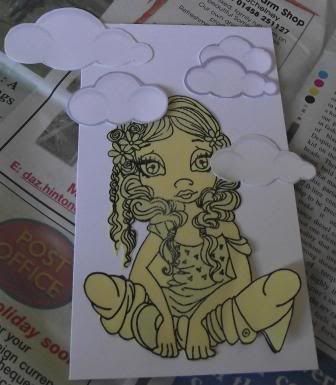
I then placed the mask over my image. I then used some wacky tape to put the clouds on. You can see I used different sizes and shapes.
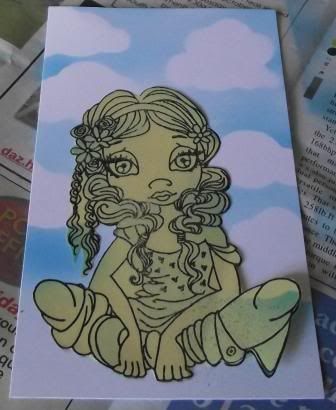
I then airbrushed. The closer to the image you are the darker the colour. I then took the clouds off and then airbrushed again but further away from the image to get a lighter colour.
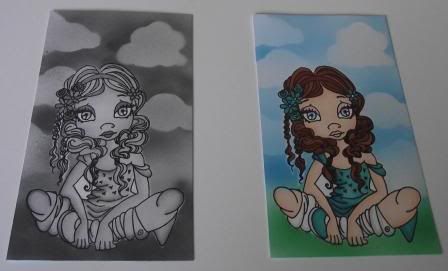
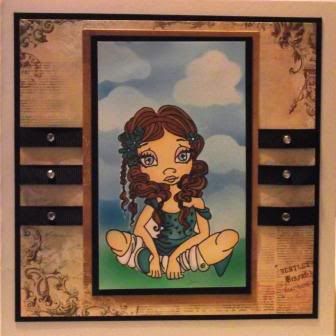
As you can see the effect is wonderful. I did the grey image aswell to show the versatility of airbrushing. I'm really pleased how they turned out. The only thing I would change is I would cut the mask even closer.
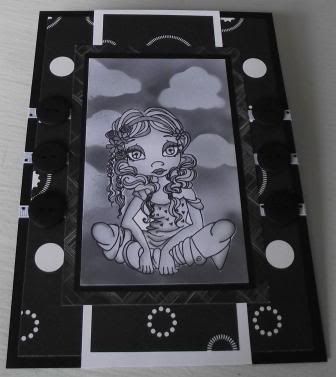
I then mat and layered the cards and added some embellishments.
Well I hope you liked this quick tutorial and will have ago at airbrushing.
Thank you to Sheila for having me as a guest designer today.
Kelly x
P.S if I get over 100 followers I'll be doing a blog candy which will include some copic sketch markers.
Kams Crafty Place
Kams Crafty Place


11 comments:
Wow this is amazing! I am just learning to color and shade with my markers, maybe someday I will get this advanced! LOVE IT! Thanks for sharing with us today.
This card is just beautiful! Love how it turned out. TFS
Gorgeous.. I am like Shelia, I am not that advanced with my copics.. I need to dust them off and get to coloring..
Gorgeous!!! I love this Kelly! Great masking tutorial and use of your airbrush!!! I love it!
Hugs,
M
How neat! I've never seen this done before. Your card looks great!
Wow! Looks terrif!!! Card is so cute, and love the image!
LOL!!! I haven't learned to color yet, so I KNOW this is way too advanced for me!!!
You did a great job!!!
Wow! What a wonderful tutorial!! You do beautiful work!!
WOW, beautiful, love the image. I'm still trying to learn Copics. LOL Great tutorial.
this is GREAT
TFS!!!!!
WOW Thanks for such a great tutorial... do not own an air brush but you are enabling me! TFS
Wow Kelly this is amazing! I love the black and white. Great tutorial. I have to head over and check your blog out.
Post a Comment