


Happy Thursday everyone! My name is Aymee Gandy, of A Scraphappy Southernbelle, and I am so excited to be here today guest designing for 'She's A Sassylady.' I am a huge fan of the blog and was thrilled when Sheila asked me to create something for the blog. So I decided to come up with a fun birthday card to share with you today. My 27th birthday is this coming Monday, October 4th, and I've really been in a mood to celebrate. You see, due to my husbands hectic work schedule and the fact that we live so far way from our family in Alabama, I usually spend my birthday alone. So this year, I have decided to cook myself a gourmet dinner and have a card to display...even if I did make it! LOL. Here's to hoping that the hubby will be home to join me. :)
Now, I don't know about you but I am huge fan of creating 'easel cards.' They are so easy and simple to make. I just love how different they look from your basic fold card. I know many of you may already know how to make an easel card, but I have received several questions on these. So I decided I would go through the process step by step for those who do not know. I promise after you learn this easy process, you'll be making these left and right.
First, you will want to start with a 12x12 piece of cardstock or patterned paper. I usually choose to go with a solid cardstock base, but that is just personal preference. Cut this piece of 12x12 cardstock in half so that you are left with 2-6x12 pieces. Set one aside, this will become your 'card base.' With the other 6x12, cut that in half so you are left with 2-6x6 squares. One of these squares will be your 'card front.' The other can be used as scrap on this card or for your next scrappy project. Now that you have your 6x12 and 6x6 pieces of cardstock, you will want to take the 6x12 and score it on the 3 and 6 inch mark as shown below.

Now, let's fold our card base to create our 'easel' mechanism. You will want to fold the base as shown below:

Now, set this aside for later, and you can start designing your 'card front'...aka the 6x6 square mentioned above. For my card, I decided to keep it simple and use one of my favorite cartridges...Create A Critter. So I pulled out my handy dandy Gypsy, Esmerelda (yes, I named her...LOL), and got to work. I welded 3 cupcake shadows together, but the rest is just basic cuts. I did use the 'hide' feature on several of the pieces though. Next, I compiled the rest of the cupcake features and also the phrase 'Happy Birthday' from the cartridge.

I cut all of the pieces I needed before I sat down at my desk to work. I layered my cupcake pieces for added dimension. I also ran the tops of my cupcakes through my Cuttlebug using the D'Vine Swirl embossing folder. Now, I knew that I somehow wanted to incorporate a cupcake liner into this card. After all it is a birthday card and that immediately makes me think of cupcakes. So, I want to show you what I have done using a single cupcake liner that can be purchased at any store.

Take the cupcake liner and cut a slit as shown:

Next, keep cutting through the bottom of the liner....

Then you will want to cut all the way around the liner. You are essentially cutting the bottom out of the cupcake liner. When you are finished, you will be left with a strip as seen below.

Now, choose where you want this 'trim' to be on your card and lay down a single strip of adhesive. As you adhere down the 'trim' of cupcake liner, it will naturally fold and pucker up a tad. This will add lots of yummy dimension to your card, so let it be poofy.

Now, I don't like to leave the top edge of my 'trim' visible, so I chose to cover up the top with some ball fringe. You could use ribbon, a cardstock strip, tulle, anything really. You will see how I have covered mine up in the picture below.
Next, finish decorating your card front and card base as desired. Then you are ready to adhere the 2 together. I recommend a strong adhesive for this. I have used adhesive runner before, but I really prefer the liquid adhesive. I use Helmar 450 Quick Dry, but any liquid adhesive would do. I love the sturdy hold it gives.

Turn you piece of 6x12 cardstock 'base' over and apply adhesive as shown below and then adhere your card front onto this flap.

Now, to keep your easel card propped up, you will want to place something to hold it up. I chose to use rhinestones. You can use buttons, trim, ribbon, anything you choose.
When you are finished, here is what you easel card could look like. Aren't these fun?!!!

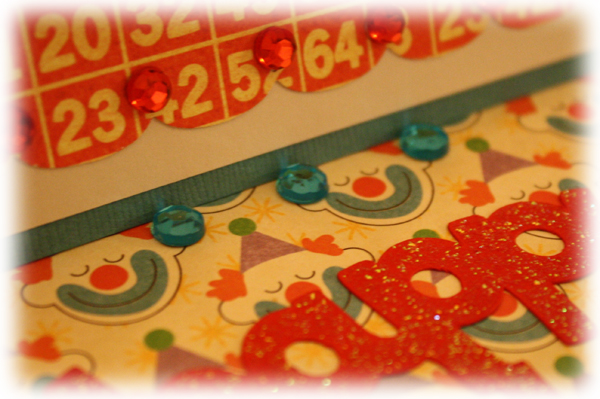
I also added some Stickles glitter glue to my card. I used it on the cherries and on the sentiment.

This patterned paper is from Sassafras Lass. I just LOVE these clowns!!

See that dimension the cupcake liner gives? As a crafter, I really love things like this that make my cards dimensional. I hope you will too.

I hope you have enjoyed this card/tutorials and that you will give these a try today! I promise they really are so fun and easy!
I would like to thank Sheila again for letting me be a guest on her fabulous blog!!!!
Have a fabulous weekend everyone and Happy Scrappin'!


18 comments:
This is adorable love everything about it- and Happy Birthday on the 4th-like th cupcake holder idea-who would of thought! Thanks for a great tutorial
Gorgeous card and what a great idea with the cupcake holders! Adorable
Happy Birthday!!! And look at this GORGEOUS card. I love it and the paper is perfect for this. Thank you for the great tutorial so I can make these cards too. How awesome! I would have never thought of cupcake paper! Thanks for sharing your talent with us today!!!
Happy birthday! Cupcake liners? Really? Who would have thought. What a great idea. This opens up a whole other avenue. Thanks for the sharing. Wow...
http://iwycd.blogspot.com/
Adorable card! I love the idea of using the cupcake liner!
Barb :)
What a cute card!! You are so creative!!! I love the cupcake liner idea!! TFS! :)
Super cute card!!!!!! Love the cupcake ruffle and the cute cupcakes!!!!
wow what a great card and a supernice tutorial. Thank you!
Aymee....this is such a sweet card !! Love the idea of using cupcake wrappers...what a great idea !!! Happy ..Early...BIrthday !!!!!! I hope it is as sweet as this card is !!
xoxo Joy
What a awesome card. AND thank you for the great instructions.
This is so awesome!! what a great iea using cupcakewrappers
LOve love love this yummy card!
This is great! Thanks for sharing. I love using the cupcake wrapper for embellishment...clever! And a very Happy birthday to you!
Aymee, how cute!!! You know I love your projects!
What a beautiful card! I love the cupcake wrapper!!! My goodness every where you look it's just gorgeous!!!
What a lovely birthday card...I really should make one of these! GREAT use of the cupcake wrapper...so clever on your cupcake birthday card! Nice tutorial too...tfs!
Such a beautiful card!! You have inspired me to make an easel card!! Thank you for such a wonderful tutorial!! This card is definitely eye candy!! :-)
Wow, Aymee. The card is stunning. Love the cupcake wrapper with the cupcakes and trim!!! Fabulous touches.
Post a Comment