


Today I have a Mother's Day "Stand-Up" Tulip Flower Candy Cup tutorial (yep, it'll stand up all by itself ) I'll be sharing with you today. This is really an oldie but, I think, a goodie! The last time I did this one was more than 10 years ago and I wasn't certain I'd even be able to remember it.. Here it is:

Before I begin, please excuse my nails! Half of my nails are broken and those that aren't look horrible!!! I'm in desperate need of a manicure but because of time/family restraints I've been under, I've been unable to have my nails tended to.
Okay, now! Because this tutorial is so picture heavy, let's get started. Materials needed:
- 1 - 4" x 4" sheet of cardstock in your choice of color (this will be used for the flower)
- 2 - 6" x 6" sheets of green cardstock (this will be for the petal stems)
- Hot glue gun and glue sticks (you can use your preferred glue; however, this gives me instant gratification -- no long drying time)
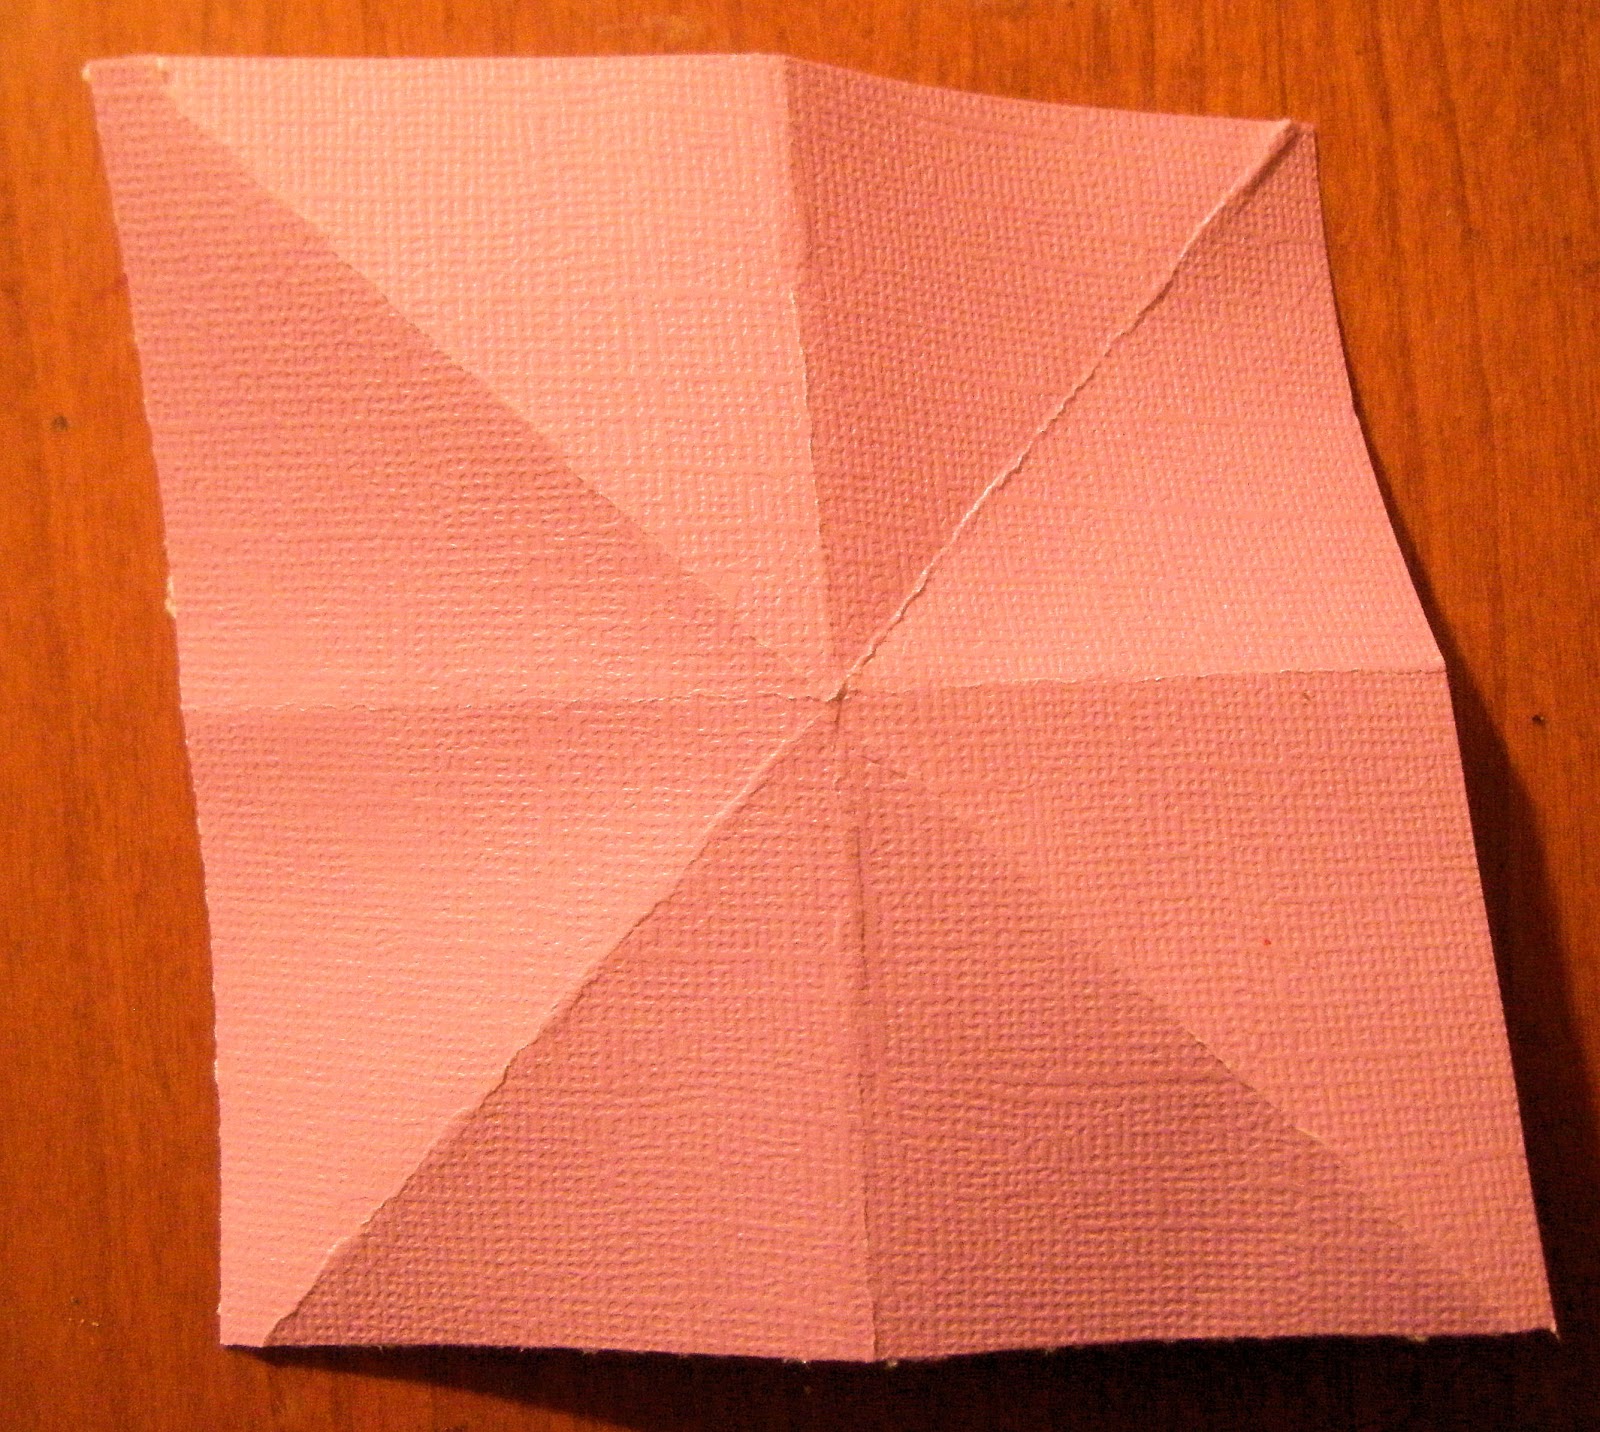
We're going to begin with the tulip flower. Take the 4" cardstock square for the flower and fold by bringing 2 outside points together to form a triangle:

Open the cardstock and fold the opposite side into a triangle as well; you'll have this:

Okay, now turn the cardstock upside down with the mountain folds on the bottom, valley folds on top, then fold into a rectangle:

Fold the opposite side into a rectangle also and cardstock will look like this:
Turn paper over so that mountain folds are on the bottom again. Now with the paper turned so that a triangle shape is facing you with a point at the top, grab the outside points on each side and bring them together to the center of the paper along the fold lines as shown below:

Keeping the outer-side points to the inside, bring and fold in together the top and bottom sections/points of the cardstock to form a square (this should come together easily because of the fold lines):

Next we're going to take the outer points on each side of the square (as shown below) and fold them in up to the center fold line:

Glue these folds down and then flip over and do the same on the other side. After gluing down all 4 folds, cut off just a wee-tiny bit from the tip of the bottom end that is closed (not the open end). The cut off end will create a small hole in the bottom of the tulip flower. Example below shows what it will look like with the tips glued in place and where to cut the closed tip end::

Great! Now let's open the flower by placing your fingers into the open end of the cardstock and pushing out the sides that are folded to the inside:

The flower should now take on the form of a box, as shown below (and there will be a hole in the bottom):

Put your flower to the side and now let's begin on the the standing petal stems. Take one of the 6" cardstock squares and fold 2 outer corners to meet forming a triangle (do only this one side):

Next fold in one bottom edge to line up with the center fold line, aligning the edge along the fold line:
 |


Next let's fold the top half under with the points on each end coming together evenly aligned; leave the last fold with the ends extending out on the top:

Looking at the picture below, add glue about 1/2 of the way down one side of the triangular fold and fold all sides to the other side with the glue sides facing each other (i.e. you'll have the 2 insides glued together but all sides of both sides will be folded together):

Once the sides are folded with the inside sides glued together, when you stand it up with the points at the top, you'll have this:

Now, with the cardstock in the upright position as shown in the picture above, grab each of the 2 tips at the top --on in each hand -- and gently pull them outward and away from each other; it will now look like this and stand alone:

This is your first petal stem, now repeat this and complete another stem petal. Once the 2 petal stems are complete, glue them together as show below with the tips together and all the way down the side:

Okay, now we have the stem with 2 leaf petals; time now to grab your flower! Add glue to the hole at the bottom of the flower and place the hole of the flower over the 2 tips that have been glued together:

Now your Mother's Day "Stand-Up" Tulip Flower Candy Box is done! You can form the petals on the flowers and stem leafs by gently folding, bending, and shaping them; like this:

I used Stickles on mine to to decorate it, give it dimension and texture (and to hide the cracks in the texture paper where it was folded -- I suggest not using textured paper...lol!)
Now fill it with chocolate kisses or other miniatrue candies, or whatever you like that'll fit!!!
This little box is easier than it looks, as you'll see once you complete one! And it's fun, not to mention a great last minute gift! You can also adjust the size by adding/decreasing the number of inches to each square.
I hope you like my project! And should you have any questions, please don't hesitate to ask me! Just click on my name at the top of the post for a direct link to my blog and be sure to leave me a comment.
Thanks so much for stopping by! And...
I'll be seeing you!


11 comments:
Audrey, this is so beautiful. I am always amazed with the ideas you come up with and your ability to not only assemble but take us through easy step by step instructions so we can replicate your wonderful design... AWESOME!!!
Look at this so unique! What a cute decoration it will make on a table. TFS
Sue
What a wonderful project perfect for Mother's day. TFS
What a wonderful idea for Monther's Day and even Teacher Appreciation! TFS.
Thanks for the tutorial. I'll have to try making some of these.
Oh Audrey! Look at You!!! Clever Girl!!!
This is AMAZINGLY BEAUTIFUL!!! LOVE IT!! TFS
WOW Audrey! This is amazing. And is so perfect for Mother's Day too. :)
Oh this is adorable...love it.
Wow. You are so talented. Your projets never fail to amaze me. TFS
Were do you come up with all this wonderful creative ideas!!? Love it Audrey!
Post a Comment