


Hi Everyone, Beth from thunderbirdlindybydesign. Today I wanted to share with you a project I have been working on since Friday. It's a 3-D Snowglobe. I started with JOS and chose the snowglobe. I just wanted the base of the snowglobe, but had to pick the whole image. I hid contours on the globe and added slits. Using double sided cardstock, I cut 2 large and 4 medium. I took them off the mat and cut the round part of the globe off.

The meduim cuts, I cut the round part off straight across, and the 2 large images, I cut them off with a slight curve.

I assembled the base putting the 4 medium together and then adding the 2 largest middle cuts.

This is what the base looks like assembled.


I used acetate(grafix sells the thin stuff in 12x12 sheets) and cut the 2 large middle globes, 4 medium globes, and 4 small globes. Here is a pic of the 2 large and 4 small.


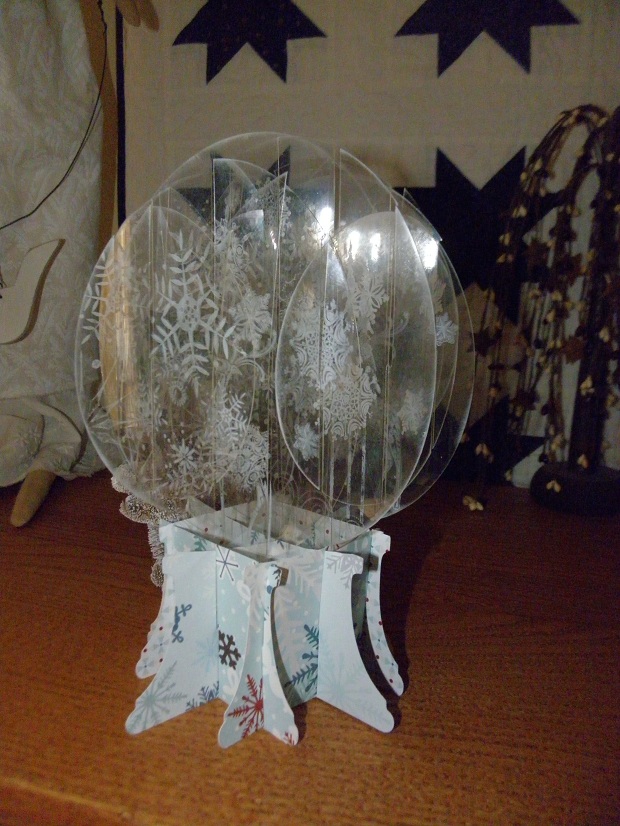
I used stazon ink in opaque and stamped various images on the clear acetate. Two things, if you stamp images that have an up and down side, the very out side slits need to be at the top of the 2 large and the 4 medium.if you don't the 4 small globe cuts slide right off when you assemble. Also, assemble the 4 medium globes first, this will create a "box". Put one of the large globes in the middle next, and the other large globe in the middle 3rd. Then on the outside slide the 4 smallest globes on.
Here it is again finished.


Because I am engineering challenged, I went thru several sheets of cheap cardstock and acetate before I got the design how I wanted it. If you don't want to cut the base, the globe itself could be hung with string and hung from the ceiling. It would look pretty great if you had several hanging in a room.
Also use a very clean sticky mat when you cut acetate, I didn't and there was some residue on the acetate after I pulled it off the mat.
I have offered up the cut file HERE in case you want to try making your own.
Thanks Sheila for having me as a guest designer, and everyone have a great Thanksgiving, but don't eat too much turkey.
Beth.


14 comments:
I love your snow globe! Thanks so much for the tutorial; I'll have to give this a try. A co-worker was given a purchased one similar to this and I've been admiring it. Now I can make one for myself and extras for gifts. TFS!
Oh this is such a pretty design Beth! Love the snowflakes that you stamped on! Gorgeous idea!
Hugs,
M
Beth this is so beautiful, I just love it! What an intricate design and so unique! Love it, those snowflakes give it the illusion that it just shimmers. Thank you for the great tutorial and offering a file for us too! AWESOME!
Wow! This is an absolutely stunning project! I have never seen acetate used this way. I am going to Pin this to my Pinterest board. Thanks so much for sharing!
How in the WORLD! Genius!
Wow! What an awesome project!! I will be giving this a try thanks to your great tutorial!!
WOW, now that's what I call a work of art. Very creative and beautiful.
Beautiful. Happy Thanksgiving.
Beth, this really is an AWESOME globe project!!! You definitely rocked it!!!
this is beautiful Beth!!!!
and thank you for the sharing the file, so sweet of you....
Oh this is just beautiful.. how creative...
Absolutely BEAUTIFUL!!! :-)
Gorgeous!!!
Awesome snow globe, its beautiful. Ide like to give this a try, but Im not to good at puzzles.
Thanks for the tutorial.
Dawn RI
Post a Comment